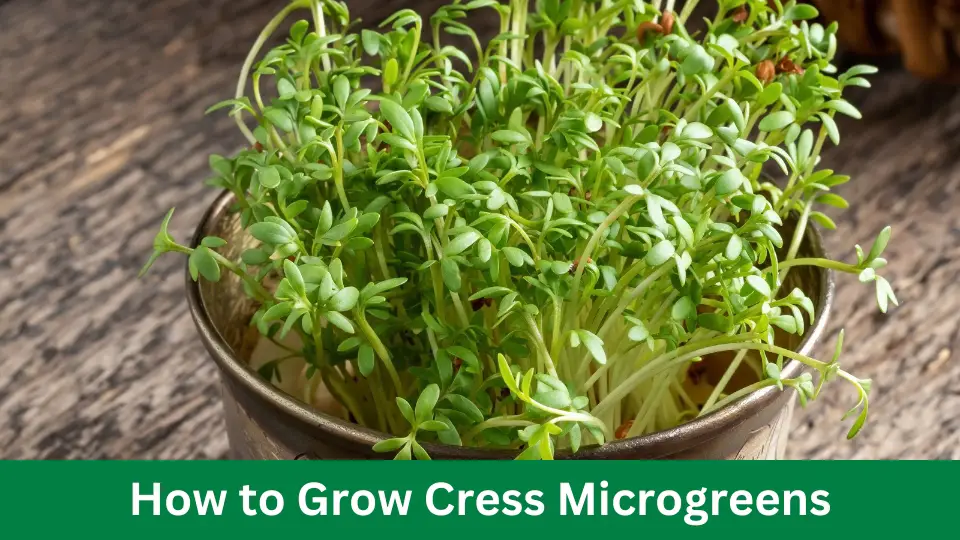
To grow cress microgreens, sow seeds densely on moist soil and expose them to sunlight. Keep the soil moist and harvest the greens in about 5-7 days.
Cress microgreens, known for their peppery flavor, are a nutritious addition to salads, sandwiches, and garnishes. Starting your cress microgreens at home is a simple and rewarding endeavor, perfect for gardeners at any level. These tiny plants pack a punch of vitamins and minerals and can be cultivated indoors year-round, requiring minimal space and equipment.
With quick germination and growth, cress microgreens offer almost instant gratification for garden enthusiasts. By maintaining the right moisture levels and ensuring adequate light, you can enjoy a fresh, home-grown harvest of cress microgreens within a week.
Sprouting Basics: Cress Microgreens
Cress microgreens are easy to grow and packed with nutrition. Many enjoy these peppery little greens for their speedy sprouting and dish versatility. Beginners can easily start their sprouting journey with cress microgreens.
Let’s dive into the essential tips and optimal growth conditions for a bountiful harvest.

Essential Starter Tips
- Quality seeds ensure healthy growth.
- Sanitized equipment prevents mold and diseases.
- Soaking is unnecessary for cress seeds. They are small and sprout quickly.
- Spread seeds evenly to avoid overcrowding.
- Mist seeds with water using a spray bottle.
Optimal Conditions For Growth
Light, temperature, and humidity play crucial roles in growing cress microgreens. Here is what you need to know:
| Condition | Description |
|---|---|
| Light | Provide 4-6 hours of sunlight or grow lights. |
| Temperature | Maintain 18-22°C for optimal sprouting. |
| Humidity | Keep around 50% for best results. |
Choosing Seeds: Quality Matters
The seeds you choose are vital when it comes to growing cress microgreens. High-quality seeds ensure a bountiful harvest and robust flavors. Therefore, selecting the right seeds is the first step toward a successful crop.

Types Of Cress Seeds
Different cress seeds offer varying flavors and growth rates. Common varieties include:
- Garden Cress: peppery taste, fast-growing
- Watercress: tangy flavor, prefers wet conditions
- Upland Cress: hearty leaves, slightly spicy
- Curled Cress: unique leaf shape, mild taste
Where To Buy The Best Seeds
Finding top-quality cress seeds can make all the difference. Look for vendors that provide:
| Purity | Germination Rate | Organic Certification |
|---|---|---|
| No fillers | Above 85% | USDA approved |
Try these places:
- Local Garden Centers: find organic options
- Online Marketplaces: read customer reviews
- Specialty Seed Retailers: find rare varieties
Preparation: From Soil To Tray
Growing cress microgreens starts with proper preparation. The journey from soil to tray is simple but crucial. In your hands, you hold fragile cress shoots, a promise, a tiny life waiting to emerge. It’s a magical process, like sowing seeds into fertile soil.
You’re nurturing a growth story when gently placing them in their new home. The tray becomes their ode to life, a haven where they can grow. This isn’t just a physical journey; it’s an emotional one, too. Embrace the joy of seeing life unfold as you grow cress. You are fostering a connection to the essence of life itself.
Here’s a step-by-step guide.

Selecting A Suitable Grow Medium
Selecting the right grow medium ensures a bountiful cress microgreen harvest. Coco coir, peat moss, or even soilless mixes are top choices. These mediums retain moisture well, which is key for seed germination. Hydroponic mats are also an excellent choice for those seeking a soil-free option. They promote clean growth and are easy to manage.
- Coco Coir: Eco-friendly and retains water efficiently.
- Peat Moss: Perfect for water retention and root support.
- Soilless Mixes: Eliminate soil-borne pests and diseases.
- Hydroponic Mats: Hassle-free and reduce mess.
Setting Up Your Planting Tray
Once the growing medium is chosen, setting up the planting tray is next. Follow these steps:
- Get a shallow tray. Around 1-2 inches deep is ideal.
- Add your grow medium. Spread it evenly, about an inch thick.
- Water the medium. It should be damp, not soaking wet.
- Spread the seeds. Distribute cress seeds evenly across the surface.
- Cover the seeds lightly. If using soil, a thin layer will do.
- Place in a warm area. Ensure it’s out of direct sunlight.
Remember, not too much water at the start. Seeds need just enough moisture to germinate.
Sowing Techniques: Achieving Even Coverage
Growing cress microgreens begins with perfect sowing. Even distribution ensures each sprout has room to thrive. Master this, and you’re halfway to lush greens.
No matter how experienced you are when growing cress microgreens, don’t underestimate the importance of proper sowing. It will yield a bountiful harvest.

Seed Density For Maximum Yield
Seed density is vital for cress microgreens. There are too few seeds, and your yield is sparse. Too many, and they’ll compete for resources.
Here’s a quick guide:
- 1 gram of cress seeds for a 5″x5″ tray.
- Scale up proportionally for larger trays.
| Tray Size | Seeds Required |
|---|---|
| 10″x20″ | 15 grams |
| 5″x10″ | 4 grams |
Spread seeds evenly across the soil for consistent growth. Use a seed shaker or your hands for precision.
Watering Methods Pre-germination
Watering your seeds before they sprout is crucial. Here’s how:
- Mist soil with a spray bottle until damp, not soggy.
- Soak seeds in water for 6-8 hours before sowing to speed germination.
- After sowing, cover seeds lightly with more damp soil.
Maintain constant moisture with daily misting. Remember, cress seeds should never dry out or sit in water. Balance is key for perfect microgreens.
Cultivation: Light, Water, And Temperature
Growing cress microgreens requires attention to light, water, and temperature. Perfect these elements, and you’ll enjoy a bountiful harvest of these nutritious greens. Get the conditions right; the cress will reward you with rapid growth and vibrant flavor.
It is a great time to embark on this journey. You are a conductor of life’s delicate symphony, a caretaker of life’s delicate symphony, not just a gardener. Your cress awaits, eager to reciprocate your love. Let your emotional tapestry of growth unfold one tender leaf at a time as you embrace the journey.

Ideal Lighting For Rapid Growth
Cress microgreens thrive under sufficient light. This promotes healthy, even growth. Begin with 12-14 hours of light daily. Use a grow light if natural light is low.
- Direct sunlight can be too intense, potentially scorching delicate shoots.
- Indirect light or grow lights offer better control over light exposure.
- Consistent lighting ensures steady growth.
Maintaining Moisture And Airflow
Watercress microgreens with care. Their moisture needs are high, yet overwatering leads to mold and disease.
| Watering Tips | Airflow Advice |
|---|---|
|
|
Monitoring Temperature For Healthy Sprouts
Microgreens prefer a consistent temperature. Keep your cress happy between 60-70°F (15-21°C).
- Avoid drastic temperature swings.
- Check temperature daily with a thermometer.
- Insulate against cold draughts in cooler climates.
Harvesting Your Cress Microgreens
Ready to enjoy the fruits, or rather, greens of your labor? Cress microgreens are a powerhouse of flavor and nutrients, and their harvest time is thrilling for any gardener. Knowing when and how to harvest can make a difference in taste and shelf-life. Let’s dive into the best practices for harvesting your cress microgreens.
When To Harvest For Peak Flavor
Timing is crucial when harvesting cress microgreens. They are most flavorful and tender when growing their first true leaves. This usually occurs around 7 to 14 days after planting your seeds.
- Look for the first set of true leaves as your signal for readiness.
- Aim to harvest in the morning, when the greens are most hydrated.
How To Cut And Store Microgreens
Gathering your microgreens is both art and science. You can harvest them with a gentle pinch and a snip without damaging the tender stems.
- Use clean, sharp scissors to avoid bruising your greens.
- Cut the microgreens just above the soil line.
- Harvest only what you need, or all at once if necessary.
Storage is just as important to maintain the freshness of your microgreens. Properly stored cress can last for about a week.
- Refrigerate immediately after harvesting.
- Use an airtight container lined with paper towels.
- Keep the container in the crisper drawer to maintain humidity.
Cress In The Kitchen: Usage And Recipes
Cress microgreens bring more than a touch of green to your plate. These tiny greens pack a peppery punch, similar to mustard or wasabi. Versatile and easy to grow, they make any dish pop with flavor.
Cress works well in salads, as a garnish, or blended into smoothies. It’s time to discover how to elevate your meals with cress microgreens, perfect for food enthusiasts and healthy eaters.
Creative Ways To Use Microgreens
Unleash the flavor of cress microgreens in your kitchen with these creative uses:
- Sprinkle on soups: Add a vibrant and spicy touch to your favorite soups.
- Boost your sandwiches: Layer cress between slices for a nutritious crunch.
- Enhance eggs: Stir into scrambled eggs or top off an omelet or quiche.
- Zesty salads: Mix with other greens for a peppery salad base.
- Smoothie spice: Blend into green smoothies for extra zing and nutrients.
Innovative Cress Microgreen Recipes
Ready for some culinary innovation? Try these exciting cress microgreen recipes:
- Cress Pesto: Blend cress with pine nuts, garlic, parmesan, and olive oil.
- Spicy Cress Dip: Mix with cream cheese, lemon, and chilies for a dip.
- Cress-Topped Pizza: Sprinkle over pizza before serving for an herbaceous bite.
- Cress and Avocado Toast: Smash avocado on toast, top with cress and a pinch of salt.
- Cress Stuffed Mushrooms: Fill mushrooms with cress, cheese, breadcrumbs, and bake.
These ideas are just the start. Inviting cress into your kitchen opens a world of flavor. Get creative and experiment with your recipes!
Frequently Asked Questions On How To Grow Cress Microgreens
How Do You Plant Cress Microgreens?
Spread seeds evenly on moist soil or paper towels to plant cress microgreens. Cover lightly with soil or another paper towel. Keep the medium hydrated and in indirect sunlight until they sprout in 3-4 days. Harvest when leaves are fully developed, typically within 7-14 days.
How Do You Grow Microgreen Watercress?
Choose a shallow tray and spread quality watercress seeds evenly. Apply a thin soil layer or use a hydroponic mat. Mist the seeds regularly to keep them moist. Place the tray in a spot with indirect sunlight. Harvest microgreen watercress after 10-14 days when they’re several inches tall.
What Is The Difference Between Microgreens And Cress?
Microgreens are diverse seedlings of edible vegetables and herbs, while cress refers specifically to the germinated seeds of watercress and similar plants. Microgreens are harvested later than cress, offering a broader flavor profile.
Conclusion
Embarking on your cress microgreens journey brings a satisfying harvest to your kitchen. With simple steps, ample sunlight, and a sprinkle of dedication, success is within reach. Remember, patience and attentiveness turn tiny seeds into lush, nutritious sprouts. Start growing today and relish the freshness in every bite!
Video Source: https://www.youtube.com/watch?v=P2F0vImnXDw