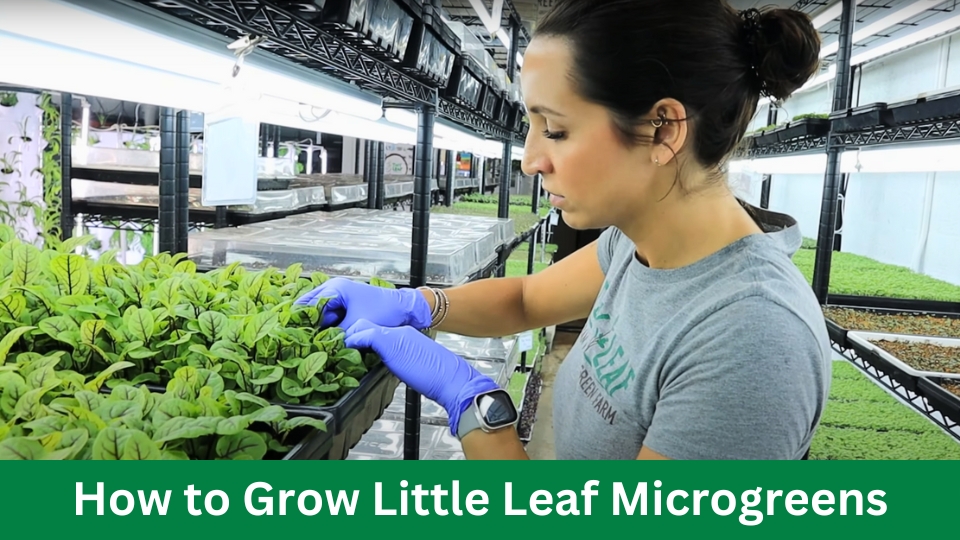
To grow little leaf microgreens, choose a suitable container, fill it with potting soil, sprinkle the seeds evenly over the surface, mist them with water, and place them in a warm, brightly lit area. Then, water the seeds regularly to keep the soil moist but not soaked.
Microgreens sprout after a few days; they can be harvested when they reach the desired size. Fresh and nutrient-dense microgreens in the shape of small leaves are now available for consumption. It is easy and rewarding to incorporate nutrition and freshness into your meals by growing your microgreens, which resemble tiny leaves.
Although minuscule in size, these greens carry a flavorful punch and are extraordinarily simple to cultivate. Growing microgreens with small leaves can be a fun and rewarding endeavor, regardless of your motivation to use your green aptitude or lack of space. You can access a consistent supply of fresh greens by following a few simple steps.
From germination to harvest, this guide will explain how to cultivate microgreens with small leaves and the best techniques for promoting robust growth. Anticipate your microgreen exploration and enhance your gastronomic endeavors with these diminutive marvels.
Choosing The Right Varieties of Little Leaf Microgreens
When it comes to growing little leaf microgreens, choosing the right varieties is crucial to success. The type of microgreen you select will determine your crop’s flavor, appearance, and nutritional content.

To help you make an informed decision, consider these factors when choosing varieties:
Microgreen Varieties To Consider
There is a wide range of microgreen varieties available, each with its own unique characteristics.
Here are some popular options to consider:
- Broccoli: Known for its mild flavor and high nutritional value, broccoli microgreens are a great choice for health-conscious individuals.
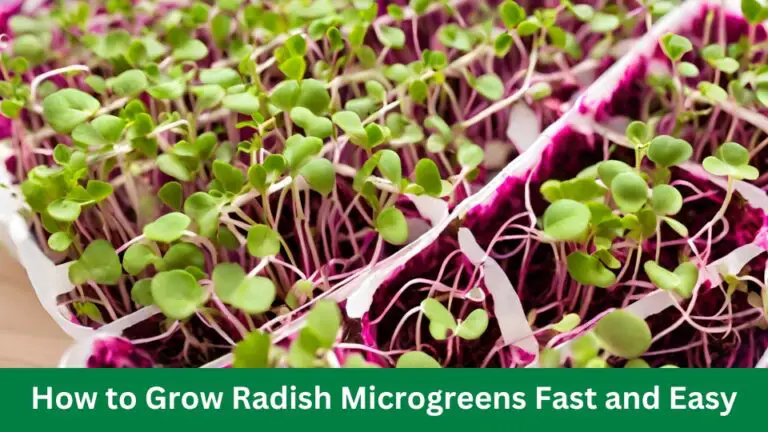
- Radish: With their peppery and tangy taste, radish microgreens add a delightful kick to salads and sandwiches.
- Sunflower: Sunflower microgreens have a nutty and slightly sweet flavor, making them a versatile option for various dishes.
- Pea: Sweet and tender pea microgreens are perfect for adding a fresh burst of flavor to your meals.
- Beet: Beet microgreens offer a unique earthy and sweet flavor, making them a fantastic addition to salads and smoothies.
Factors To Consider When Choosing Varieties
While taste is undoubtedly an essential factor, here are a few other considerations when choosing microgreen varieties:
- Difficulty level: Some microgreen varieties are easier to grow than others. If you’re new to microgreen cultivation, it’s best to start with beginner-friendly options.
- Growth rate: Different microgreen varieties have different growth rates. If you’re looking for a quick harvest, opt for varieties that germinate and mature rapidly.
- Yield: Consider the amount of yield you expect from each variety. Some varieties may give you a higher yield per tray, while others may produce fewer microgreens.
- Color and appearance: Microgreens come in various colors, ranging from vibrant greens to deep reds. Choose varieties that appeal to your aesthetic preferences or complement your culinary creations.
- Flavor intensity: The intensity of the flavor can vary among microgreen varieties. If you prefer milder tastes, opt for varieties with a subtler flavor profile.
By considering these factors and exploring different microgreen varieties, you can find the perfect combination to suit your taste and preferences. Experiment with various options to create an exciting and diverse microgreen garden.
Preparing The Growing Environment
Discover the key steps to prepare the optimal growing environment for little leaf microgreens, ensuring successful growth and harvest. Learn the essential techniques and factors to consider for thriving microgreen cultivation.
Creating A Suitable Growing Space
When it comes to growing little leaf microgreens, creating a suitable growing space is essential for their healthy development. Ideally, you should set up a dedicated spot in your home that receives sufficient light and has a consistent temperature.

Here are a few tips to help you create the perfect environment for your microgreens:
- Choose a location that receives at least six to eight hours of sunlight per day.
- Avoid areas with extreme temperature fluctuations, as consistent temperatures promote optimal growth.
- Ensure good air circulation by keeping the growing space well-ventilated.
- Consider using grow lights if you don’t have access to a sunny spot to provide your microgreens with the necessary light they need to thrive.
Choosing The Right-Growing Medium
The choice of the growing medium is crucial for the success of your little leaf microgreens. The right growing medium provides essential nutrients and supports healthy root development. Here are some options to consider:
| Growing Medium | Advantages |
|---|---|
| Coconut coir | Retains moisture well and has good drainage. |
| Peat moss | Absorbs water easily and provides good aeration. |
| Rockwool | Offers excellent water retention and allows for good root penetration. |
| Vermiculite and perlite | Ensure adequate moisture and improve the soil structure. |
When choosing your growing medium, make sure it is free from contaminants and is specifically designed for microgreen production. It’s also essential to properly moisten the growing medium before sowing your little microgreen seeds.
Sowing And Germination for little leaf microgreens
Growing little leaf microgreens is a rewarding and cost-effective way to enjoy fresh, nutrient-packed greens at home. This section will explore the essential steps for sowing and germinating these delicate little plants.
By following these techniques, you can ensure successful growth and an abundant harvest of vibrant and flavorful microgreens.

Preparing The Seeds For Sowing
Before you begin sowing your little leaf microgreens, it is crucial to prepare the seeds properly. Follow these steps to ensure optimal germination:
- Choose high-quality seeds: Select seeds specifically labeled for microgreen production, as these are bred for superior flavor and yield.
- Inspect for damage: Before sowing, carefully examine your seeds for any signs of damage or discoloration. Discard any that appear unhealthy or compromised.
- Pre-soaking (optional): Some varieties of microgreens benefit from pre-soaking the seeds, which helps to speed up germination. Refer to the specific instructions for your chosen variety.
By preparing your seeds properly, you lay the foundation for successful germination and healthy microgreens. Let’s now explore the techniques for ensuring a successful germination process.
Techniques For Successful Germination
Germination is a critical stage in the growth of microgreens. By following these techniques, you can maximize the germination rate and set your little leaf microgreens up for success:
- Moisture: Microgreens thrive in a moist environment, so provide adequate moisture during germination. Mist the soil lightly to keep it consistently damp, but avoid overwatering.
- Temperature: Maintain an optimal temperature range of 65°F to 75°F (18°C to 24°C) during germination. Using a seedling heat mat or putting the seeds in a warm place will accomplish this.
- Light: While exposure to direct sunlight is not necessary during germination, providing gentle, indirect light helps stimulate growth. A fluorescent or LED grow light placed a few inches above the seeds works well.
- Air circulation: Good air circulation is essential for preventing the development of mold or disease. Use a low-speed fan set to gently circulate the air around your microgreens during germination.
Remember to monitor the progress of your little leaf microgreens regularly. As soon as you notice the first signs of growth, it’s time to transition them to their next development stage.
With proper sowing and germination techniques, you’ll soon be enjoying a bountiful harvest of nutritious and delicious microgreens!
Providing Adequate Light
Microgreens are delicate and require precise care to ensure their growth and development. One vital aspect of cultivating little-leaf microgreens is providing adequate light. Understanding the light requirements and choosing the right lighting setup can significantly impact the growth and quality of these tiny greens.
Understanding The Light Requirements Of Little Leaf Microgreens
Little leaf microgreens necessitate specific light conditions for their optimal growth. These diminutive plants thrive in bright, indirect sunlight and require approximately 12–16 hours of light daily.
Adequate exposure to light ensures that the microgreens develop vibrant green leaves and robust stems, enhancing their flavor and nutritional value.

Choosing The Right Lighting Setup
Choosing the proper illumination configuration is critical when growing microgreens with minute leaves. Consider using LED grow lights with height adjustments for consistent and uniform illumination.
By providing the ability to adjust the distance between the lights and the microgreens, these lights guarantee that the latter receive an optimal quantity of light to support their growth.
Additionally, rotating microgreen containers encourage uniform development by promoting consistent light distribution.
Watering And Fertilizing
It is critical to hydrate microgreens on a consistent basis in order to ensure their success. Provide vital nutrients for healthy development by fertilizing them with a diluted organic fertilizer once they have produced their initial true leaves.
Watering and fertilizing are crucial aspects of growing little leaf microgreens. Adequate fertilizer and irrigation practices can substantially affect the growth and quality of microgreens. In this discourse, we shall examine the fundamental methodologies pertaining to hydrating and fertilizing that are imperative for the prosperous development of little leaf microgreens.

Proper Watering Techniques
When watering little leaf microgreens, it’s important to ensure the soil remains consistently moist. Employing a gentle irrigation system or a spray container can mitigate the risk of upsetting fragile seeds and seedlings.
Excessive irrigation can cause root rot and other complications. Additionally, watering the microgreens from the underside is vital to promoting robust root growth.
Choosing The Right Fertilizer
Selecting the appropriate fertilizer is essential for the optimal growth of little leaf microgreens. Search for a balanced, water-soluble fertilizer with a higher nitrogen content to encourage verdant growth.
Organic fertilizers are frequently advised due to their sustainable, natural, and mild nutrient delivery. To prevent nutrient burn, always observe the manufacturer’s instructions regarding dilution and application.
In summary, the ability to effectively hydrate and fertilize is critical for the successful cultivation of microgreens with small leaves. By adhering to these recommended methodologies, one can guarantee microgreens that are robust in flavor and nutrients.
Managing Pests And Diseases
Managing pests and diseases is crucial for a successful harvest when it comes to growing little leaf microgreens. In addition to employing natural and organic pest control methods, identifying common pests and diseases can help safeguard microgreens and promote optimal growth.
Let’s take a closer look at these important aspects.
Identifying Common Pests And Diseases
To effectively manage pests and diseases, it is important to identify the common culprits that can harm your little leaf microgreens. By recognizing the signs of an infestation or infection, you can take prompt action to prevent further damage.
Common Pests:
| Pest | Signs of Infestation |
|---|---|
| Aphids | Clusters of tiny, soft-bodied insects on leaves. |
| Fungus Gnats | Flying insects around the plants and soil and visible larvae in the soil. |
| Spider Mites | Webbing on the plants, yellowing leaves, and specks on the leaves. |
Common Diseases:
- Damping Off: This fungal disease causes seedlings to wilt and collapse at the base.
- Powdery Mildew: A white, powdery growth on the leaves and stems, leading to stunted growth.
- Root Rot: Infected roots become mushy and discolored, leading to the yellowing and wilting of the plants.
Natural And Organic Pest Control Methods
When it comes to pest control for your little leaf microgreens, opting for natural and organic methods is environmentally friendly and safer for consumption.
Here are some effective techniques to keep your microgreens pest-free:
- Companion Planting: Planting pest-repellent herbs and flowers near your microgreens can help deter common pests.
- Neem Oil Spray: Diluted neem oil can be used as a natural pesticide to control various pests. Apply it regularly for the best results.
- Diatomaceous Earth: Sprinkling food-grade diatomaceous earth around your microgreens creates a barrier that kills pests by dehydrating them.
- Biological Controls: Introducing beneficial insects like ladybugs or nematodes can help control pests without the use of chemicals.
- Proper Sanitation: Regularly remove any dead or decaying plant matter to avoid attracting pests or encouraging disease spread.
By employing these natural and organic pest control methods, you can maintain a healthy growing environment for your little leaf microgreens, ensuring bountiful and nutritious harvests.
Harvesting And Storage
When the desired size and healthy leaves have developed on your little leaf microgreens, it is time to harvest and store them properly.
This section will delve into the two critical elements of storage and harvesting: determining the appropriate time to harvest and employing appropriate storage methodologies.

Knowing When To Harvest
Harvesting microgreens requires harvesting them at the ideal time. It is permissible to harvest microgreens when they have a vertical dimension of approximately 1-2 inches. They must also see the emergence of true leaves.
Depending on the variety and growing conditions, the time required for microgreens to reach this stage may differ.
Proper Storage Techniques
After harvesting your little leaf microgreens, storing them properly is important to maintain their freshness and quality.
Here are some proper storage techniques to follow:
- Cool temperatures: Microgreens are most flavorful and last longer when stored at cool temperatures. Ideally, store them at around 35–40°F (1-4°C) in a cool refrigerator or a dedicated mini-fridge if available.
- Moisture management: Excess moisture can cause microgreens to wilt or develop mold. Before storing, gently wash and dry the microgreens to remove any moisture on the leaves. You can use salad spinners or paper towels for this purpose.
- Airtight containers: Store them in airtight containers or plastic bags to prevent moisture loss and keep microgreens fresh. Make sure to remove as much air as possible before sealing the containers.
- Proper labeling: It’s a good practice to label your containers with the date of harvest to keep track of their freshness. Use small labels or sticky notes to avoid any confusion.
- Regular checks: Periodically check on your stored microgreens to ensure they are still fresh and free from any signs of spoilage. If you notice any discoloration, mold, or unpleasant smell, discard them immediately.
By following these harvesting and storage techniques, you can enjoy the full flavor and nutritional benefits of your little leaf microgreens for an extended period of time.
Troubleshooting Common Issues
Little leaf microgreen growth can be an enjoyable endeavor, but it is similar to any horticultural pursuit and presents significant obstacles.
This section will expound on the most common challenges that farmers may face and offer pragmatic resolutions to help you manage them.
Dealing With Leggy Microgreens
Plants that have become tall and spindly are known as leggy microgreens, which frequently result from a lack of light. If your microgreens look leggy, here are some steps you can take to encourage healthier growth:
- Place your microgreens where they can receive bright, indirect sunlight for around 12–16 hours a day.
- Consider using a grow light if natural light is limited or not sufficient. Position the light source about 2–3 inches above the tops of the microgreens.
- Rotate your trays regularly to ensure even exposure to light. This will help prevent the microgreens from growing towards the light source.
Addressing Mold And Rot
Mold and rot are common issues that can occur when growing microgreens. Here are some steps you can take to prevent and address these problems:
- Clean and sterilize your growing trays and equipment using a mild bleach solution or hydrogen peroxide before each use.
- Ensure good airflow around your microgreens by using a fan or opening windows. Excess humidity can contribute to mold growth.
- Water your microgreens from below using a tray with drainage holes to prevent excess moisture accumulation.
- If you notice mold or rot on a few microgreens, remove the affected ones immediately to prevent further spread.
- To prevent future issues, adjust the frequency and amount of watering to ensure the soil is moist but not overly saturated.
Frequently Asked Questions On How To Grow Little Leaf Microgreens
How Do You Grow Mini Greens?
To grow mini greens, choose a shallow container, fill it with moistened soil, and sprinkle the seeds evenly. Cover with a thin layer of soil, mist with water, and place in a sunny spot. Keep the soil consistently moist, and harvest the mini greens when they reach 1-2 inches in height.
What Are the Most Difficult Microgreens to Grow?
The most difficult microgreens to grow include cilantro, carrots, and dill due to their sensitive nature and longer growing durations. These microgreens require extra attention to moisture, temperature, and light to flourish successfully.
Will microgreens regrow after cutting?
Yes, microgreens can regrow after cutting.
Final Decision
Developing microgreens with minute leaves is a satisfying and advantageous pursuit. By adhering to these methodologies and recommendations, one can effectively nurture these nourishing crops in one’s personal space. Always provide adequate light, moisture, and ventilation for optimal results, and harvest your microgreens frequently.
You can enjoy the fresh and vibrant flavors of your homegrown little leaf microgreens with patience and care.
Video Source: https://www.youtube.com/watch?v=88V66lwx8ls