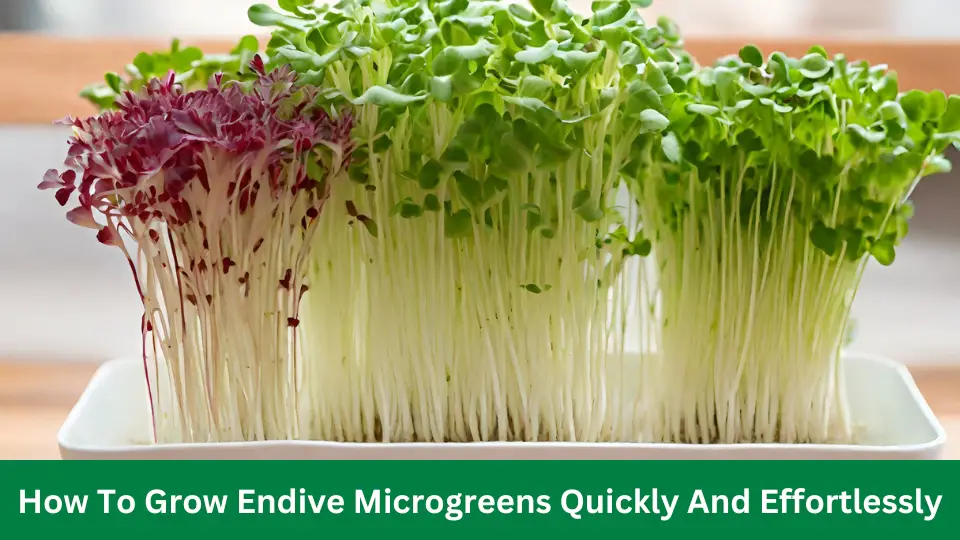
Growing endive microgreens quickly and effortlessly requires sufficient sunlight and maintaining a consistent moisture level in the soil.
Additionally, keeping the temperature between 60-70°F will promote faster growth. By following these guidelines, you can enjoy a bountiful harvest of fresh and nutritious endive microgreens without much effort.
Read on to discover more tips for successful cultivation.
Understanding Endive Microgreens
When it comes to growing your own nutritious and delicious microgreens, endive microgreens are an excellent choice to consider. These tiny but mighty greens are packed with vitamins, minerals, and antioxidants that can benefit your health in various ways. This article will explore the basics of endive microgreens, including what they are, why you should choose them, and their health benefits.
What Are Microgreens?
Microgreens are the tender, young shoots of vegetables and herbs harvested just a few weeks after germination. While they may be small, they are rich in flavor and nutritional value. Microgreens are usually grown from vegetables like kale, broccoli, and radishes or herbs like basil and cilantro.
Why Choose Endive Microgreens?
Endive microgreens, derived from the cabbage plant (Cichorium endivia), offer a distinct taste and a wide range of benefits, making them a popular choice among microgreen enthusiasts. Here are some reasons to choose endive microgreens:
-
Distinctive flavor: Endive microgreens have a mildly bitter taste with a hint of nuttiness, adding a distinct flavor profile to your dishes.
-
Quick and effortless growth: Endive microgreens are known for their rapid growth, making them ideal for those who want fresh greens quickly.
-
Diverse culinary uses: These microgreens can be used in various culinary creations, including salads, sandwiches, smoothies, and garnishes.
-
Year-round cultivation: Endive microgreens can be grown indoors throughout the year, ensuring a steady supply of fresh greens for your culinary endeavors.
Health Benefits Of Endive Microgreens
Aside from their delightful taste, endive microgreens offer various health benefits that make them a valuable addition to your diet. Here are some of the essential health benefits you can expect from consuming endive microgreens:
| Health Benefit | Description |
|---|---|
| High in nutrients | Endive microgreens are packed with essential vitamins, minerals, and fiber, providing a concentrated dose of nutrition to support overall health. |
| Antioxidant-rich | Antioxidants, such as vitamins C and E, found in endive microgreens, help protect your cells from damage caused by free radicals and oxidative stress. |
| Anti-inflammatory properties | The phytochemicals in endive microgreens have anti-inflammatory properties, which may help reduce inflammation and support overall well-being. |
| Supports heart health | The natural compounds in endive microgreens have been associated with lower blood pressure levels and improved heart health. |
By incorporating endive microgreens into your meals, you can give your body a nutritional boost and enjoy their delightful taste simultaneously.
Setting Up Your Endive Microgreens Growing Space
These helpful tips make setting up your endive microgreen growing space quick and effortless. Maximize your yield by creating an optimized environment for these nutritious greens.
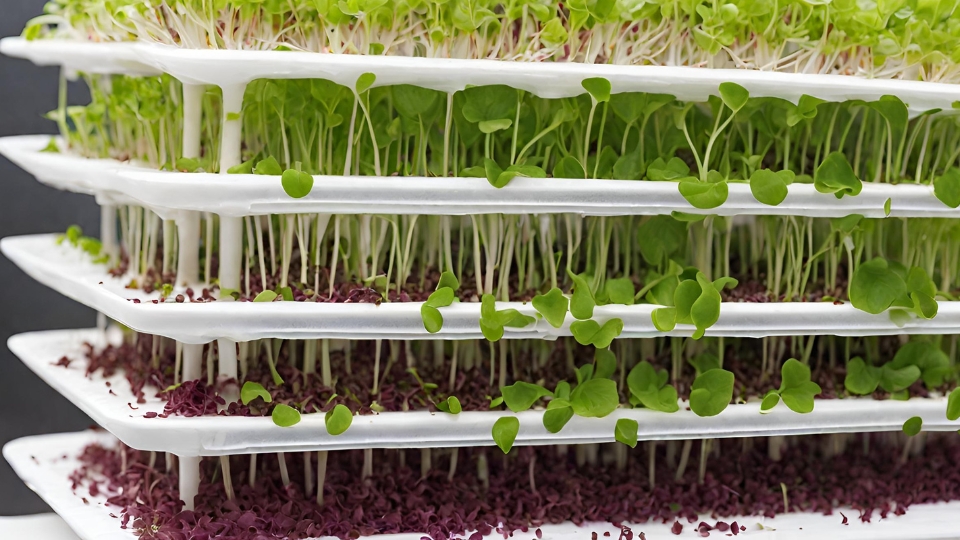
Growing your endive microgreens can be a rewarding and cost-effective way to incorporate fresh, nutritious greens into your diet. Setting up a dedicated growing space for your endive microgreens is critical to ensure successful growth and maximum yield. This article will explore the key elements to consider when setting up your gardening space. These elements include choosing the correct container and soil, providing optimal lighting and temperature conditions, and ensuring proper ventilation.
Choosing The Right Container And Soil For Growth
The first step in setting up your endive microgreen growing space is selecting the appropriate containers and soil. Containers have several options. You can use shallow trays, such as seed or hydroponic trays, allowing easy handling and efficient space use. Alternatively, you can opt for individual containers, such as small pots or recycled food containers.
Regardless of the container you choose, providing adequate drainage to prevent waterlogging is essential, which can lead to mold and root rot. To achieve this, ensure the containers you choose have drainage holes or layer the bottom with gravel.
When it comes to soil, a high-quality organic seed-starting mix or potting soil is recommended. These soil types are well-drained and nutrient-rich, providing an ideal environment for endive microgreens to thrive. Avoid using garden soil, which may contain pests or diseases that harm your delicate microgreens.
Optimal Lighting And Temperature Conditions
Proper lighting is crucial for endive microgreen growth. These greens require bright and indirect light to develop vibrant leaves. Position your growing space near a sunny windowsill or use artificial lighting, such as fluorescent tubes or LED grow lights.
Endive microgreens prefer excellent conditions. Ideally, maintain a temperature of around 65 to 75°F (18 to 24°C) in your growing space. Avoid exposing your microgreens to extreme heat or cold, which can hinder their growth and lead to premature bolting.
The importance of proper ventilation
Proper ventilation is often overlooked but crucial for healthy, endive microgreens. An efficient airflow prevents excess moisture, which can lead to mold and fungal diseases. It also strengthens microgreen stems, promoting sturdy and upright growth.
To provide adequate ventilation, ensure proper air circulation. You can achieve this by placing a small fan nearby to encourage air movement or by opening a window to allow fresh air exchange. Regularly inspect your microgreens for any signs of moisture buildup or pest infestation, and take necessary measures to address these issues promptly.
By setting up your endive microgreen growing space with the appropriate containers and soil, providing optimal lighting and temperature conditions, and ensuring proper ventilation, you are well on to increasing these nutritious greens quickly and effortlessly.
Step-by-step Process For Growing Endive Microgreens
You’ve come to the right place if you want to grow endive microgreens quickly and effortlessly. Endive microgreens are packed with nutrients and add a delightful crunch to salads, sandwiches, and more. This step-by-step guide will guide you through selecting and preparing endive seeds, pre-soaking and sowing the roots, and caring for your growing endive microgreens. Let’s get started!
Selecting And Preparing Endive Seeds
When growing endive microgreens, selecting the right seeds is crucial for a successful harvest. Look for organic, non-GMO endive seeds specifically labeled for microgreen production. These seeds will ensure your microgreens are healthy and free from harmful pesticides.
Once you have your seeds, preparing them for planting is essential. To enhance germination, pre-soak the seeds in water for 6-8 hours. This process softens the seed coat and kickstarts the germination process, resulting in faster and more uniform growth.
Pre-soaking And Sowing The Seeds
Place the endive seeds in a clean container and cover them with water to pre-soak them. Make sure there is enough water to submerge the roots fully. Leave them to soak for the recommended time, usually 6-8 hours.
Once the seeds have been pre-soaked, it’s time to sow them. Select a shallow, well-drained container or tray suitable for growing microgreens. Fill the container with a high-quality soilless growing medium, such as coconut coir or peat moss, and level it out.
Next, evenly sprinkle the pre-soaked endive seeds over the growing medium’s surface. Aim for dense but not overcrowded coverage. Press the seeds into the growing medium with your fingers or a small piece of cardboard to ensure maximum seed-to-soil contact.
Caring For Your Growing Endive Microgreens
Caring for your endive microgreens is relatively easy but requires some attention to ensure optimal growth. Here are some essential care steps to follow:
-
Watering: Keep the growing medium consistently moist throughout the growing process. Avoid overwatering, as excessive moisture can cause diseases.
-
Lighting: Place your tray of endive microgreens in a location receiving bright, indirect sunlight. If natural light is insufficient, you can supplement with a grow light to ensure healthy and vigorous growth.
-
Temperature: Endive microgreens thrive between 60 and 75°F (15 and 24°C). Avoid exposing them to extreme temperature fluctuations, which can impact their growth.
-
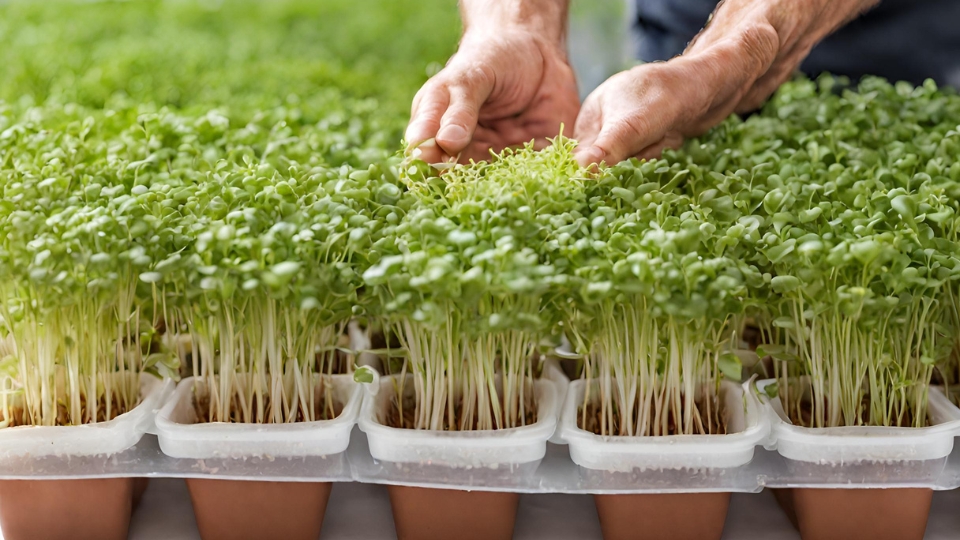
Harvesting: After 10-14 days, when your endive microgreens have reached a height of 2-3 inches, they are ready to be harvested. Cut them above the soil line using clean scissors or a sharp knife.
Following these simple steps, you can grow endive microgreens quickly and effortlessly. Enjoy the fresh and vibrant taste of these nutritious greens in your favorite dishes!
Troubleshooting Common Issues With Endive Microgreens
When it comes to growing endive microgreens, it is expected to encounter common issues that can hinder their growth and development. This section will address some of the most common problems regarding growing microgreens and provide solutions to overcome them. By identifying these issues early on and taking appropriate action, you can ensure your endive microgreens thrive quickly and effortlessly.
Dealing With Inadequate Growth Or Low Germination Rates
If you find that your endive microgreens are not growing as expected or the germination rate is low, several factors could contribute to this issue:
-
Temperature variability: Endive microgreens prefer a consistent temperature range between 70-75°F (21-24°C). Fluctuations in temperature can prevent proper growth and germination. Ensure that the growing environment remains within the ideal range.
-
Improper watering: Overwatering or underwatering can lead to inadequate growth or low germination rates. It is crucial to maintain proper moisture levels in the growing medium. Water your endive microgreens carefully, ensuring the soil is moist but not soaked.
-
Low-quality seeds: Sometimes, the issue lies with the quality of endive seeds. Using reputable sources to purchase seeds ensures high germination rates. Select seeds labeled for microgreen production.
-
Insufficient light: Endive microgreens require abundant light to grow properly. They may struggle to grow and develop if they do not receive enough light. Ensure they have 12–16 hours of bright, indirect sunlight, or use artificial grow lights if natural light is lacking.
Addressing Issues With Pests And Diseases
Pests and diseases can pose significant threats to the health and growth of your endive microgreens. Here are some common problems you may encounter, along with recommended solutions:
| Pest/Disease | Symptoms | Solution |
|---|---|---|
| Aphids | Stunted growth, distorted leaves, sticky residue | – Introduce beneficial insects like ladybugs\n- Remove aphids manually\n- Use organic insecticidal soap |
| Fungus gnats | Visible adult gnats, larvae in the growing medium | – Allow the soil to dry between waterings\n- Use yellow sticky traps to catch adult gnats\n- Apply beneficial nematodes to control larvae |
| Mold | Fuzzy growth on the microgreens | – Ensure proper air circulation\n- Use a sterile growing medium\n- Decrease watering frequency if soil remains consistently wet\n- Apply an organic fungicide if necessary |
| Damping-off | Seedlings collapse and rot at the base | – Use sterile starting trays and soil\n- Avoid overwatering and keep humidity levels moderate\n- Apply a natural fungicide to prevent damping-off |
Preventing Mold And Over-watering
Mold growth and over-watering can be common issues when growing endive microgreens. To prevent these problems, follow these recommendations:
- Ensure proper air circulation by providing adequate space between trays and using fans if necessary.
- Use a sterile growing medium formulated specifically for microgreens to minimize mold growth risk.
- Avoid over-watering by allowing the topsoil to dry out between waterings. Stick your finger into the soil to check the moisture level before watering.
- If the growing environment is consistently humid, consider using a dehumidifier or an exhaust fan to lower humidity levels.
By proactively addressing and troubleshooting these common issues, you can ensure consistent growth and successful cultivation of your endive microgreens. With proper care and attention, you will harvest flavorful and nutritious endive microgreens.
Harvesting And Storing Your Endive Microgreens
When growing endive microgreens, the ultimate satisfaction lies in the harvest. After carefully nurturing your crop, it’s time to reap the rewards of your effort and work. This section will discuss the essential steps to ensure a successful harvest and proper storage of your endive microgreens.
Determining The Right Time To Harvest
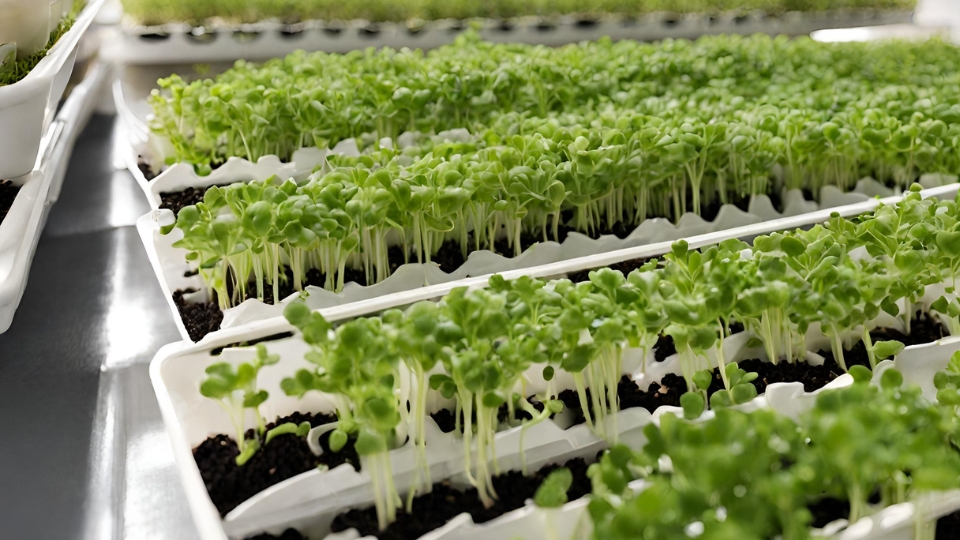
Harvesting endive microgreens at the optimum stage is crucial to enjoy their full flavor and nutritional benefits. Generally, endive microgreens are ready to be harvested when they have reached a height of around 1 to 2 inches and have developed their first set of true leaves. This usually takes about 10 to 14 days after sowing the seeds.
Here are some signs to look for when determining the right time to harvest your endive microgreens:
- The microgreens have developed their second set of leaves.
- The stems are sturdy and about 1 to 2 inches in height.
- The leaves have vibrant green coloration and show no signs of yellowing or wilting.
- The flavor is at its peak, offering a mild and slightly bitter taste.
Proper Techniques For Cutting And Storing Microgreens
Once you have determined that your endive microgreens are ready for harvest, it’s time to cut and store them. Following these steps will help you maintain microgreen freshness and quality:
- Cutting: Use a sharp pair of scissors or a clean knife to cut the microgreens just above the soil level. Ensure your cutting tool is sanitized to prevent any contamination. Pruning at this level helps to preserve the root system, allowing for regrowth in subsequent cuttings.
- Prepping: Gently rinse the harvested microgreens with cool water to remove dirt or debris. Pat them dry with a clean cloth or paper towel, careful not to damage the delicate leaves.
- Storage: To extend the shelf life of your endive microgreens, storing them properly is essential. Place the dry microgreens in an airtight container lined with a paper towel or a damp cloth to maintain a humid environment. Store the container in the refrigerator, where the microgreens can stay fresh for up to a week.
Utilizing Endive Microgreens In Your Culinary Creations
Endive microgreens offer a delightful addition to various culinary creations, adding a distinctive flavor and aesthetic appeal. Here are some ideas on how to incorporate these vibrant greens into your dishes:
- Salads: Toss a handful of endive microgreens into your favorite salad mix to impart a fresh and slightly bitter taste. Their tender texture and vibrant green color will elevate any salad.
- Sandwiches and Wraps: Add a layer of endive microgreens to your sandwiches or wraps for a delightful crunch and a burst of flavor. They pair exceptionally well with cheese, meats, and other sandwich fillings.
- Garnishes: Sprinkle endive microgreens on top of soups, stir-fries, or roasted vegetables to add an elegant touch and a hint of bitterness to your dishes.
- Smoothies and Juices: Combine endive microgreens into your favorite smoothie or juice recipes for an added nutritional boost. Their mild bitterness blends well with various fruits and vegetables.
Frequently Asked Questions For How To Grow Endive Microgreens Quickly And Effortlessly
How Do You Grow Endive Microgreens?
To grow endive microgreens, follow these steps:
- 1. Soak endive seeds in water for 8-12 hours.
- 2. Spread pre-moistened soil in a container or tray.
- 3. Sprinkle the soaked seeds evenly on top of the soil.
- 4. Cover the seeds with a thin layer of soil.
- 5. Water lightly and keep the container in a well-lit area. Harvest the microgreens after about 10-14 days.
How Fast Does Endive Grow?
Endive grows relatively fast, usually around 75 to 90 days from seed to harvest.
How Do You Grow Microgreens Efficiently?
To grow microgreens efficiently, follow these five guidelines:
- 1. Select high-quality seeds.
- 2. Choose an appropriate growing medium like soil or hydroponics.
- 3. Provide optimal temperature, light, and humidity conditions.
- 4. Water regularly, but avoid over-watering.
- 5. Harvest immediately by cutting just above the soil line.
How Do You Grow Endive Microgreens Quickly?
Endive microgreens can be grown quickly by choosing a suitable variety, providing proper lighting, temperature, and moisture levels, using quality soil or growing medium, and ensuring adequate air circulation. Regularly watering and fertilizing the microgreens will also help them to overgrow.
Harvesting them at the right time is crucial for optimum growth.
Conclusion
To conclude, growing endive microgreens quickly and effortlessly can be achieved by following the right techniques and methods. By ensuring proper lighting, adequate watering, and regular maintenance, you can enjoy a bountiful harvest of these nutritious greens in no time.
Remember to use high-quality seeds and provide optimal growing conditions for the most reliable results. So get started and enjoy these tasty and nutritious microgreens at home. Happy growing!

