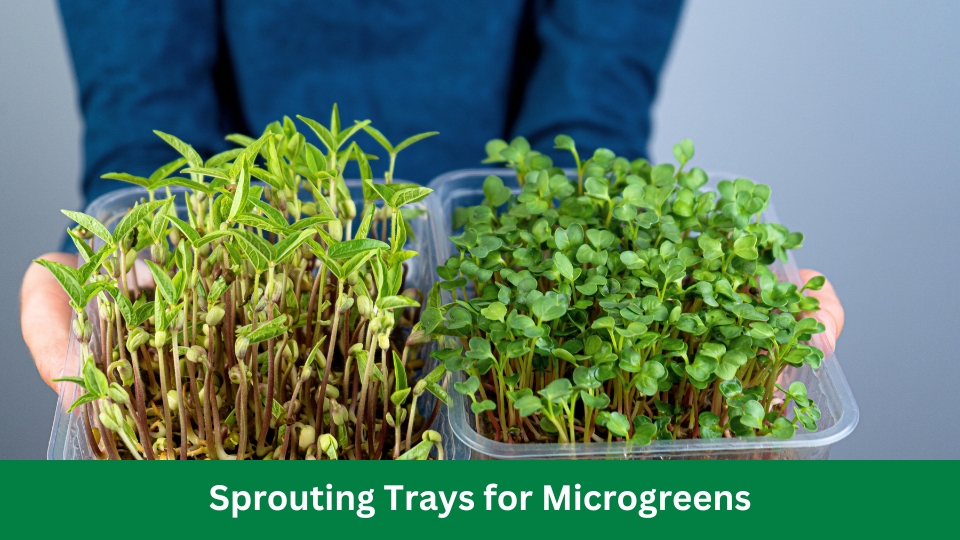
Sprouting Trays for Microgreens
Sprouting trays for microgreens are essential for growing and harvesting small edible plants. These trays provide an optimal environment for germination and growth, allowing you to cultivate a variety of nutritious and flavorful greens easily.
With their compact size and easy-to-use design, sprouting trays are convenient for anyone interested in home gardening or commercial microgreen production. Whether you are a beginner or an experienced gardener, sprouting trays offer a controlled and efficient method of growing microgreens in any space.
They are essential for anyone looking to enjoy the benefits of fresh, homegrown microgreens year-round.
Why Sprouting Trays Are Essential For Microgreens
Growing microgreens have gained popularity in recent years, for good reason. These tiny greens pack a nutritional punch and bring flavor to any dish. Microgreens require sprouting trays. These trays offer several benefits that contribute to the successful growth of microgreens.
Let’s explore why sprouting trays are essential for microgreen enthusiasts.
Improving Germination Rates
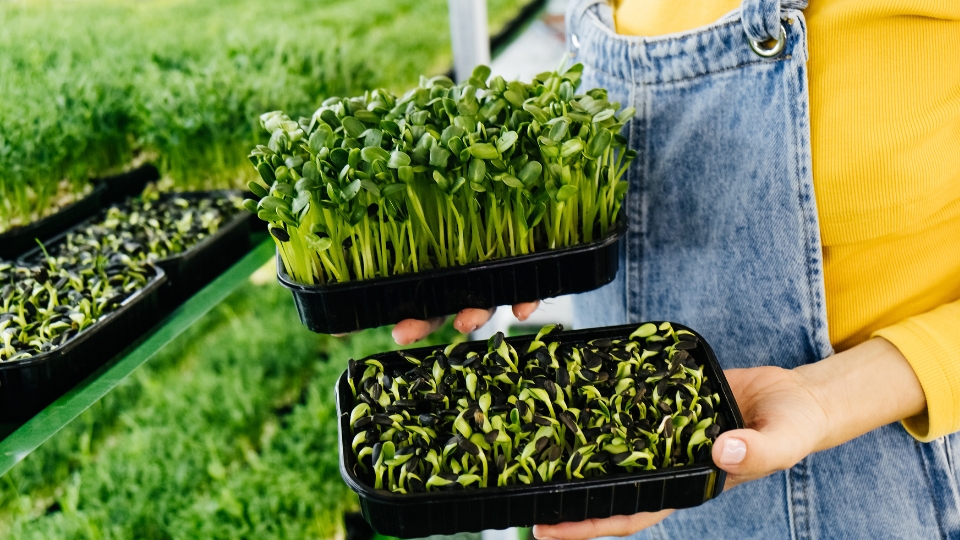
One of the key advantages of using sprouting trays for microgreens is the improvement in germination rates. These trays provide the ideal environment for seeds to sprout, making possible quicker and more consistent growth.
The spacious design of the trays allows seeds to spread out evenly. This allows each seed to receive the nutrients and water needed to germinate effectively. This results in higher germination rates and higher microgreen yields.
Promoting Healthy Root Growth
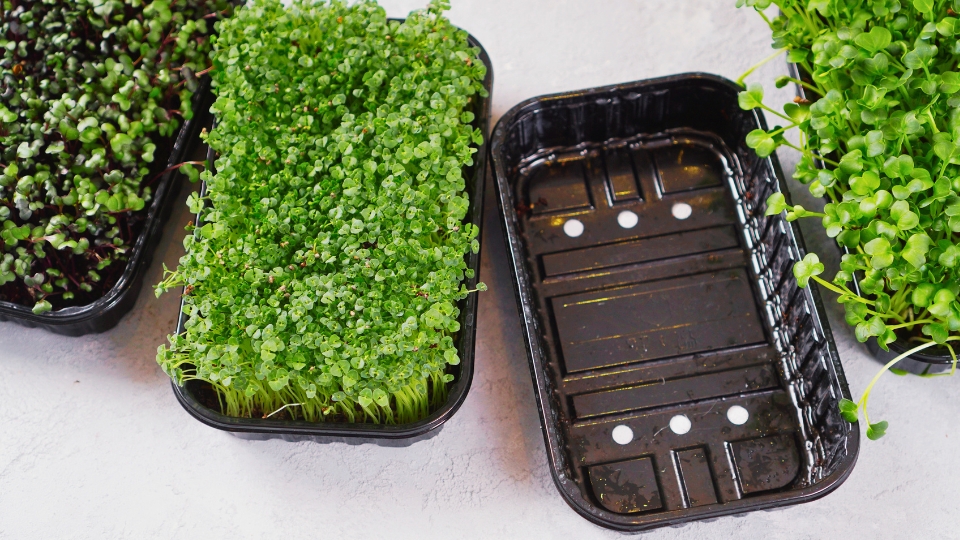
The health of microgreens relies heavily on the development of robust root systems. Sprouting trays play a crucial role in promoting healthy root growth. The trays are designed with drainage holes, which allow excess water to escape, preventing waterlogged soil and the risk of root rot.
The tray’s depth also provides ample space for the roots to grow long. This aids in absorbing nutrients and ensuring microgreens reach their full potential in flavor and nutritional content.
Maximizing Space Efficiency
Space efficiency is a significant consideration for microgreen cultivation, especially with limited space. Sprouting trays offer a compact and organized solution to maximize space utilization.
These trays can be stacked, allowing you to grow multiple microgreen varieties simultaneously in a small area. The compact design makes it easier to manage and care for microgreens, as you can efficiently water and monitor each tray without hassle.
Whether you have a small apartment or a spacious backyard, sprouting trays enable you to create a bountiful microgreen garden with minimal space requirements.
Choosing The Right Sprouting Tray
When growing microgreens, selecting the right sprouting tray is crucial. The choice of tray can greatly impact your microgreen crop’s success. Various factors such as materials, size, depth, and tray design features significantly determine the best tray for your microgreens.
This article aims to provide you with the necessary information to make an informed decision regarding these important considerations.
Materials For Sprouting Trays
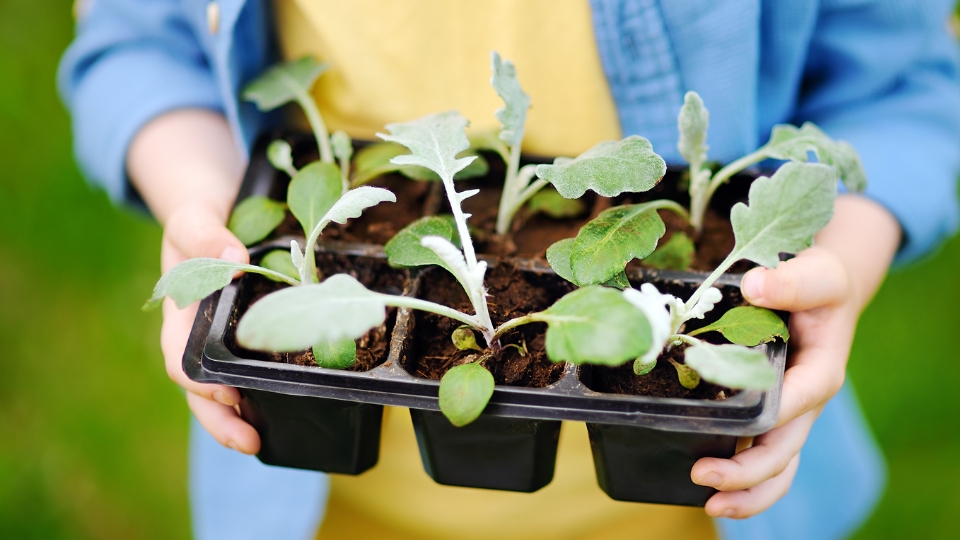
Choosing the right material for your sprouting trays is essential for successful microgreen cultivation. Different materials have their unique advantages and drawbacks.
Let’s look at some commonly used materials for sprouting trays and their characteristics:
| Material | Advantages | Drawbacks |
|---|---|---|
| Plastic | Durable and lightweight | Potential for chemical leaching |
| Stainless Steel | Long-lasting and easy-to-clean | Relatively more expensive |
| Bamboo | Eco-friendly and aesthetically pleasing | Prone to warping and moisture damage |
Size And Depth
Consider the sprouting tray’s size and depth to accommodate your microgreens’ needs. The tray size determines the number of microgreens you can grow at once, while the depth is crucial to promote proper root development.
“Generally, a depth of 1.5 to 2 inches is recommended to allow ample space for the roots to grow.”
Tray Design Features
Tray design features can greatly enhance the convenience and efficiency of growing microgreens. Here are some important design features to look out for:
- Drainage Holes: Adequate drainage is essential to prevent waterlogging and the risk of mold or rot. Look for trays with sufficient drainage holes.
- Stacking Ability: If space is limited, trays stacked on top of each other allow for efficient use of vertical space.
- Ventilation: Good airflow is crucial for healthy microgreen growth. Look for trays with ventilation features to ensure proper oxygen circulation.
By considering the materials, size and depth, and tray design features, you can choose the best trays for your microgreens. Remember, the right tray can optimize the growth of your microgreens, providing you with a bountiful harvest.
Preparing The Sprouting Tray
When growing microgreens at home, having the right sprouting tray is essential. The sprouting tray acts as a mini garden for your microgreens, providing the ideal environment for germination and growth.
Here, we will guide you through preparing your sprouting tray so that microgreens can be cultivated effectively.
Cleaning And Sanitizing
The first step in preparing your sprouting tray is to ensure its cleanliness and sanitation. This helps to prevent the growth of harmful bacteria or fungi that could negatively impact the health of your microgreens.
Follow these simple steps to clean and sanitize your sprouting tray:
- Remove any previous growing medium that may be leftover from previous crops.
- Wash the tray with mild soap and clean water. Make sure to scrub away any dirt or residue that may be present.
- Rinse the tray thoroughly to remove any soap residue.
- Sanitize the tray with a bleach solution. Mix 1 part bleach with 9 parts water in a spray bottle and spray the solution onto the tray. Let it sit for a few minutes, then rinse thoroughly with clean water.
- Air-dry the tray completely before adding the growing medium.
Adding A Growing Medium
Once your sprouting tray is clean and sanitized, it is ready for growing medium. The growing medium provides the necessary support and nutrients for your microgreens to thrive.
Here’s how to add a growing medium:
- Select a suitable growing medium for your microgreens. Options include potting soil, coconut coir, vermiculite, or specialized microgreen soil.
- Moisten the growing medium with water. It should be damp but not soggy. Excess water can lead to root rot and other issues.
- Add the growing medium to the sprouting tray, spreading it evenly across the surface. It should be approximately 1 to 2 inches deep.
- Press down gently on the growing medium to ensure good contact with the tray and remove any air pockets.
- Smooth the growing medium’s surface with your hand or a small tool, creating an even bed for your microgreen seeds.
Now that your sprouting tray is prepared and ready, it’s time to sow your microgreen seeds! With a clean and sanitized tray and a suitable growing medium, your microgreens will have the best chance to germinate and grow into healthy, vibrant plants.
Germinating Microgreens In Sprouting Trays
Discover the efficient way to grow microgreens with sprouting trays. Achieve successful germination and healthy growth for your microgreens using these specialized trays.
Microgreens are nutrient-rich young vegetable greens harvested just a few weeks after germination. Growing microgreens in sprouting trays is an easy and convenient way to enjoy flavorful and nutritious greens in your home. Germinating microgreens in sprouting trays provides optimal conditions for seeds to sprout and grow into vibrant and healthy microgreens.
This section discusses the steps to germinate microgreens in sprouting trays. This includes selecting and soaking seeds, sprouting methods, and providing optimum conditions.
Selecting And Soaking Seeds
To begin the germination process, it is important to select high-quality seeds for your microgreens. Choose seeds specifically labeled for microgreens, as these are bred to produce tender shoots with intense flavors. Before sowing the seeds, it is crucial to soak them in water.
Soaking the seeds helps kickstart germination by softening the seed coat and activating enzymes that promote growth. It is recommended to soak the seeds in clean water for a specific period, depending on the type of seed. Smaller seeds require shorter soak time, while larger seeds need longer.
For example, broccoli microgreen seeds can be soaked for approximately 8-12 hours, while sunflower microgreen seeds require about 12-24 hours.
Sprouting Methods
Once the seeds have been soaked, it’s time to transfer them to the sprouting tray. There are various sprouting methods you can choose from, depending on your personal preference and the type of sprouting tray you have.
Here are some popular sprouting methods:
- Traditional Method: Spread the soaked seeds evenly on a moistened sprouting tray. Gently press the seeds into the tray to ensure good seed-to-soil contact. To create a humid environment, keep the seeds covered with a second tray or germination dome.
- Stacking Tray Method: This method involves using multiple stacking trays, allowing several layers of sprouting trays to be stacked on top of each other. It is an efficient way to grow many microgreens in a limited space.
- Vertical Garden Method: This method utilizes a vertical growing system, where sprouting trays are vertically stacked, and water drips down from the top tray to the bottom tray. It is a space-saving option that provides excellent air circulation.
Providing Optimum Conditions
To ensure successful germination and healthy growth of microgreens, it is essential to provide optimum conditions. Here are a few key factors to consider:
- Temperature: Microgreens thrive at temperatures between 65 and 75°F (18 to 24°C). Maintaining a consistent temperature promotes faster and even germination.
- Light: Microgreens require sufficient light to grow properly. Place your sprouting trays in a well-lit area, preferably near a window or under grow lights. Provide 12-16 hours of light per day for optimal growth.
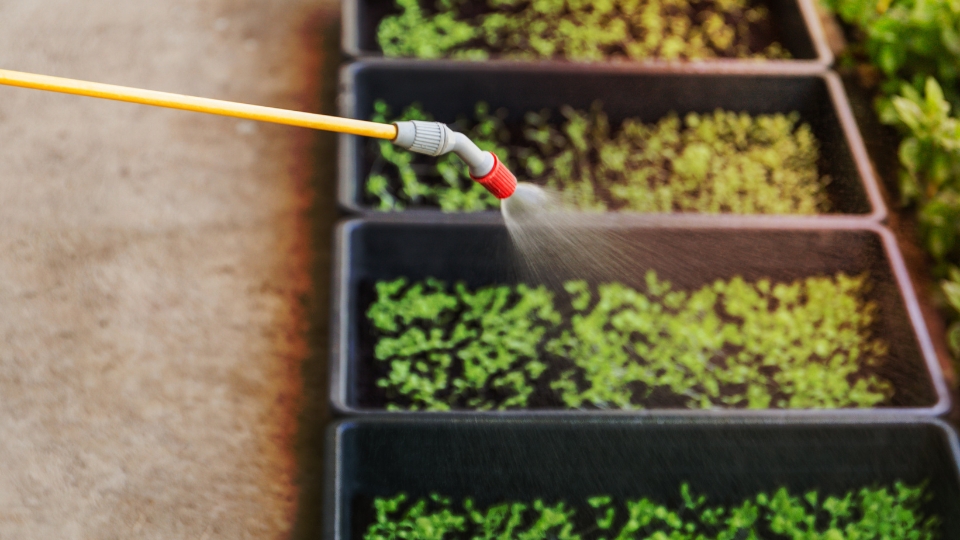
- Watering: Water your sprouting trays regularly, keeping the soil evenly moist but not waterlogged. Use a spray bottle or a gentle watering to avoid dislodging the seeds or damaging the delicate shoots.
- Air Circulation: Adequate air circulation prevents mold or disease development. Ensure proper ventilation by lifting the cover of the sprouting trays for a short period each day or using a small fan to increase air movement.
You can successfully germinate microgreens in sprouting trays by following these steps and providing the optimum conditions. Remember to monitor the progress of your microgreens daily and harvest them when they reach the desired size. Enjoy the satisfaction of growing fresh and nutritious microgreens in your kitchen!
Caring For Microgreens In Sprouting Trays
Discover essential tips for caring for microgreens in sprouting trays and ensuring successful growth. Find out how to nurture your microgreens for optimal flavor and nutrition, from proper watering to optimal lighting.
Caring for your microgreens in sprouting trays is crucial to ensuring their proper growth and development. You can nurture healthy and vibrant microgreens by providing the right amount of water, controlling moisture levels, ensuring proper light exposure, and preventing mold and pests. This post aims to provide some essential tips to help you care for your microgreens effectively.
Watering And Moisture Control
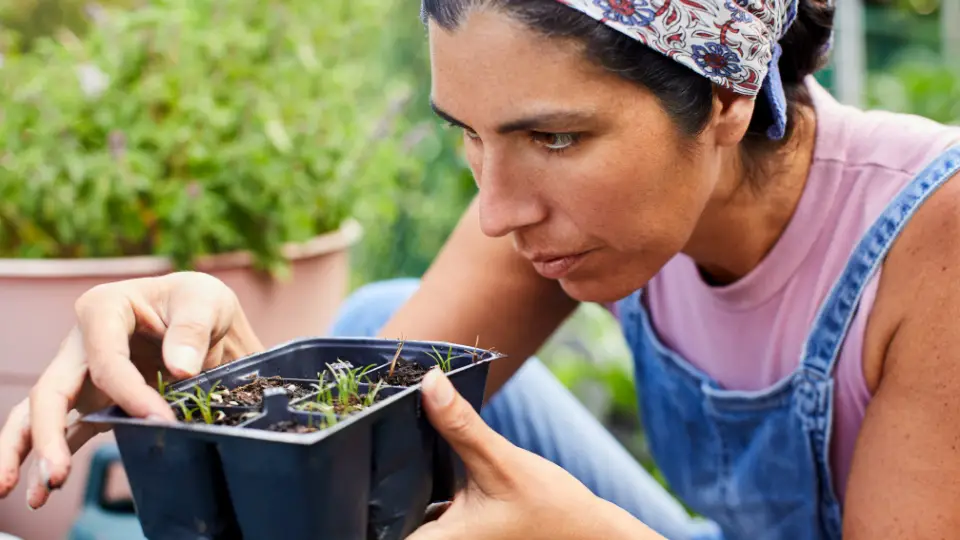
Proper watering and moisture control are vital for microgreen care in sprouting trays. Avoid overwatering, as excessive moisture can lead to rotting and fungal growth. On the other hand, underwatering can result in dry and withered microgreens.
To strike the right balance, following a regular watering schedule is recommended. Water the tray evenly, ensuring the soil is moist but not soggy. Consider lining the tray with drainage holes or adding pebbles at the bottom to prevent waterlogging.
Light Requirements
Since microgreens rely heavily on light for photosynthesis, providing them with adequate light is essential. Place the sprouting tray in a well-lit area, preferably near a window or under grow lights. Natural sunlight is usually the best option, as it provides the full spectrum of light required for healthy growth.
If natural light is limited or unavailable, you can use artificial grow lights specifically designed for indoor gardening. Position the lights at an appropriate distance from the tray to ensure optimal light intensity.
Avoiding Mold And Pests
Mold and pests can quickly damage your microgreens and hinder their growth. Ensure proper ventilation by allowing air circulation around the sprouting tray to prevent mold. Avoid overcrowding microgreens, as it can create a damp environment conducive to mold growth.
Additionally, inspect your sprouting tray regularly for pest signs such as flies or aphids. If infested, remove the affected plants immediately and take preventative measures to safeguard the remaining microgreens. These essential care tips for your microgreens in sprouting trays will help you cultivate healthy, flavorful, and nutrient-rich greens.
Monitor moisture levels, provide adequate light, and keep mold and pests at bay. You can enjoy a bountiful harvest of delicious microgreens at home with proper care and attention.
Harvesting Microgreens From Sprouting Trays
Harvesting microgreens from sprouting trays is an exciting and rewarding task for any home gardener or enthusiast. These tiny greens pack a punch of flavor and nutrition, making them popular for adding a fresh and vibrant touch to salads, sandwiches, and more.
But how do you know when to harvest them? What techniques should you use to ensure a successful harvest? The purpose of this article is to address these concerns and offer you valuable insight into the harvesting of microgreens from sprouting trays.
Determining The Right Time To Harvest
Timing is key when it comes to harvesting microgreens from sprouting trays. You want to wait until the greens have fully developed their first set of true leaves while they are still tender and young. This usually takes 10 to 14 days after sowing the seeds, but it can vary depending on the microgreens you’re growing.

To determine if your microgreens are ready for harvest, look for these signs:
- The first set of true leaves is fully developed and distinct from the cotyledon leaves.
- The greens have reached a desirable height, usually around 1 to 3 inches.
- The color of the leaves is vibrant and intense.
- The texture of the leaves is crisp and tender.
Harvesting Techniques
When harvesting microgreens from sprouting trays, you can use a few techniques to ensure a clean and efficient harvest.
Here are some popular techniques:
- Cut and Harvest: Cut the microgreens right above the soil line using a sharp, sanitized pair of scissors or a kitchen knife. Make quick cuts to avoid damaging the plants or disturbing the soil.
- Trimming: Instead of cutting the microgreens at the soil line, trim them just above the cotyledon leaves. This technique allows you to harvest the top portion of the greens while leaving the base intact for potential regrowth.
- Whole Tray Harvest: If you’re growing microgreens in a small tray or container, you can harvest the entire tray immediately by gently pulling out the greens. This technique is great for use in salads or as a garnish.
Once you’ve harvested your microgreens, rinse them gently with water to remove any soil or debris. Pat them dry with a clean kitchen towel, or use a salad spinner for quicker drying. Remember to store them in airtight containers in the refrigerator to maintain freshness and flavor.
With these harvesting techniques in mind, you can now confidently grow and enjoy your supply of delicious and nutritious microgreens from sprouting trays. Remember to experiment with different varieties and find your favorite greens to enhance your culinary creations!
Cleaning And Reusing Sprouting Trays
Keeping and reusing your sprouting trays clean is cost-effective and beneficial for the environment. With proper tray maintenance and disinfection techniques, you can ensure that your sprouting trays are ready for a new batch of microgreens.
The purpose of this blog post is to discuss the importance of proper tray maintenance and how to disinfect your sprouting trays effectively.
Proper Tray Maintenance
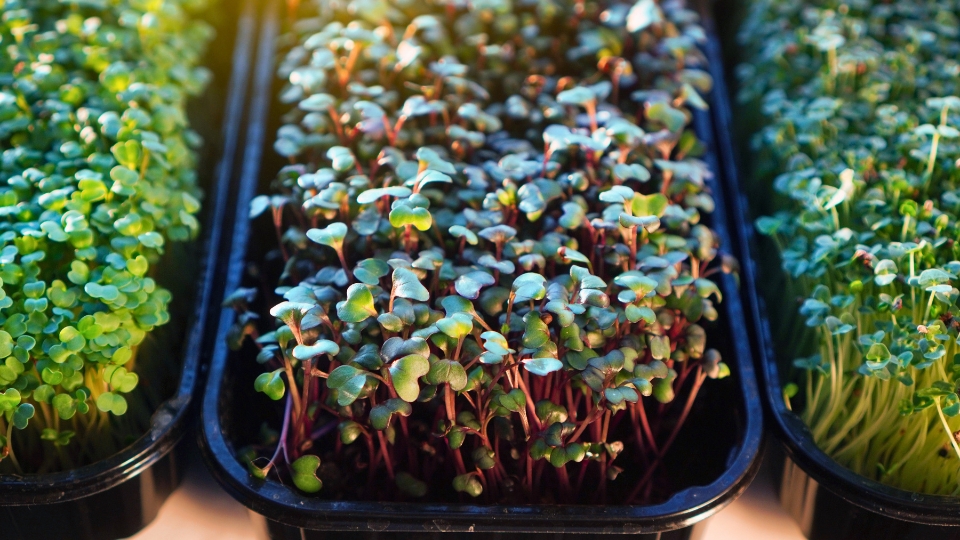
Proper tray maintenance is essential to ensure the longevity and cleanliness of your sprouting trays. You can keep your trays in top condition for multiple uses by following a few simple steps.
- After each use, remove any leftover soil or debris from the sprouting trays.
- Wash the trays with mild soap and warm water, removing any residue or stains.
- Rinse the trays thoroughly to remove any soap residue.
- Allow the trays to air dry completely before storing them.
Regularly practicing proper tray maintenance can prevent bacteria buildup and ensure your sprouting trays are always ready for use.
Disinfecting For Reuse
In addition to regular maintenance, it is essential to disinfect your sprouting trays before reusing them. This helps eliminate potential pathogens or bacteria that may have accumulated during the previous use.
To disinfect your sprouting trays, you can follow these steps:
- Start thoroughly cleaning the trays, as mentioned in the proper tray maintenance section.
- Prepare a solution of 1 part bleach to 10 parts water.
- Place the trays in the bleach solution for about 10 minutes, ensuring that all surfaces are submerged.
- Remove the trays from the solution and rinse them thoroughly with clean water.
After rinsing, allowing the trays to air dry completely before using them again is crucial. This eliminates any remaining bleach residue, making your sprouting trays safe for growing microgreens.
Regular disinfection is necessary to maintain a hygienic environment for your microgreens and prevent contamination.
Troubleshooting Common Issues With Sprouting Trays
While growing microgreens in sprouting trays is a cost-effective and efficient way to enjoy fresh, healthy greens, there can be some common issues. Addressing these problems promptly is essential for successful microgreen growth. This section discusses three common sprouting tray issues and how to troubleshoot them effectively.
Preventing Seed Rot
Seed rot is common when the sprouting trays are not properly drained. Excess moisture in the tray can lead to mold and bacteria growth, ultimately causing the seeds to rot.
To prevent seed rot, follow these steps:
- Ensure proper drainage in the sprouting tray using a tray with drainage holes at the bottom.
- Place a saucer or tray below the sprouting tray to collect excess water.
- Monitor the moisture levels in the tray and avoid overwatering.
- Allow proper air circulation by placing the trays in a well-ventilated area.
These preventive measures can significantly reduce the risk of seed rot and ensure healthy, vibrant microgreen growth.
Addressing Overcrowding
Overcrowding is another common issue that can hinder the growth of microgreens in sprouting trays. When the seeds are sown too densely, they compete for light, water, and nutrients, resulting in weak and stunted plants. To address overcrowding in your sprouting trays, consider the following guidelines:
- Sow the seeds thinly and evenly across the sprouting tray.
- Allow enough space between the seeds for proper growth.
- If you notice overcrowding, thin out the excess seedlings by snipping them gently at the soil level.
These practices will help ensure that each microgreen has enough room to thrive and reach its full potential.
Dealing With Yellowing Or Wilting
Yellowing or wilting of microgreens can indicate various issues, including nutrient deficiencies, overwatering, or inadequate sunlight.
To address these problems, consider the following:
- Check the watering schedule and adjust if necessary. Aim for a balance between keeping the soil moist and avoiding overwatering.
- Provide adequate sunlight or artificial lighting to ensure proper photosynthesis.
- Check the nutrient levels of the soil and supplement if necessary.
These steps will help revive yellowing or wilting microgreens and promote healthy, vibrant growth.
Expanding Your Sprouting Tray Setup
Once you have dipped your toes into the world of microgreens and experienced the joy of growing them in sprouting trays, you may crave more.
Expanding your sprouting tray setup is a natural next step to scaling up production and maximizing microgreen yield. Our goal in this blog post is to explore two key strategies to help you scale up production using multiple tray systems.
Scaling Up Production
As demand for your homegrown microgreens grows, it’s essential to have a system to meet this demand. Scaling up your production means increasing the quantity and variety of microgreens you can grow.
This can be achieved by investing in additional sprouting trays to expand your setup. By adding more trays, you can grow more microgreens simultaneously. This ensures a steady supply for your culinary experiments or selling to local markets or restaurants.
To optimize your production, consider spreading out your planting schedule over time. This way, you can harvest microgreens continuously, guaranteeing a fresh supply at any given time.
Using Multiple Tray Systems
Another effective strategy for expanding your sprouting tray setup is by using multiple tray systems. Multiple trays allow you to multitask and diversify your crops rather than relying on a single tray to grow all your microgreens.
With multiple tray systems, you can designate each tray for a specific type of microgreen or even experiment with different varieties within each tray. This increases your production capacity and adds variety to your harvest.
| Benefits |
|---|
| Maximize space utilization |
| Minimize the risk of contamination |
| Optimize watering and nutrient distribution |
| Enable experimentation with different growing conditions |
Expanding your sprouting tray setup is an exciting journey in microgreen-growing endeavors. You can enjoy a bountiful harvest of vibrant and nutrient-packed microgreens by scaling up production and utilizing multiple tray systems.
So why wait? Get started expanding your sprouting tray setup and watch your microgreen garden thrive!
FAQs For Sprouting Trays For Microgreens
What Are Trays Best For Microgreens?
Microgreens’ best trays are designed for their needs—ones that offer proper drainage, ventilation, and durability. These trays are designed to support the growth and health of microgreens, making them the ideal choice.
How Do You Sprout Microgreens In A Tray?
Sprouting microgreens in a tray is easy. First, fill a tray with soil and moisten it. Then, spread microgreen seeds evenly on the soil. Cover the tray with a clear lid or plastic wrap to create a greenhouse effect. Keep the tray in a warm, well-lit area and mist the soil regularly.
In about a week, you’ll have fresh microgreens to enjoy!
Do Microgreen Trays Need Drainage Holes?
Yes, microgreen trays need drainage holes. Proper drainage is essential for preventing waterlogged soil and ensuring the healthy growth of microgreens.
Conclusion
Sprouting trays are essential for growing microgreens efficiently and effectively. They provide the perfect environment for germinating and developing seeds into healthy and nutritious greens. Their compact size and user-friendly design make sprouting trays easy for anyone to experience the joy of growing their microgreens at home.
So why not try it and embark on a journey towards fresher and healthier living? Happy sprouting!
Video Source: https://www.youtube.com/watch?v=QEBLYL3LrMw&t=755s


