How To Grow Microgreens Without Soil
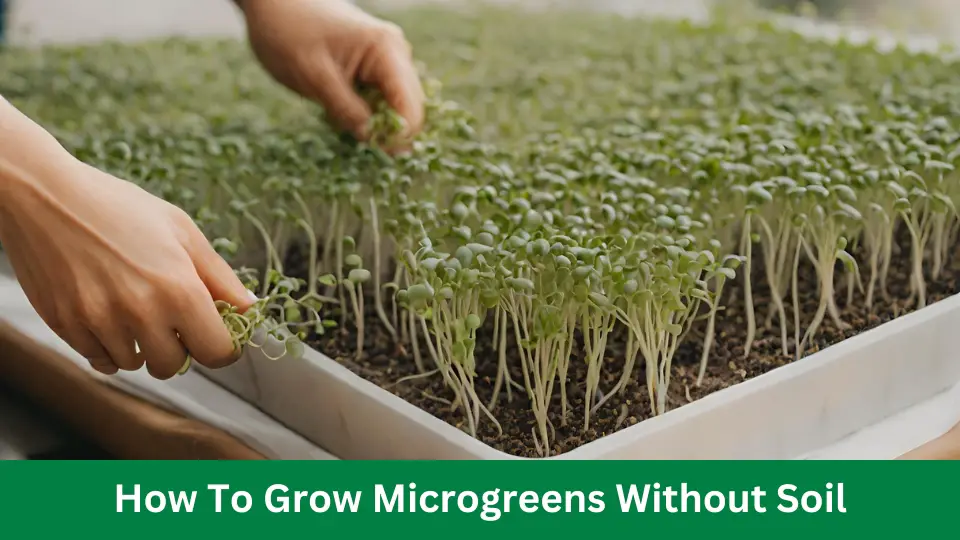
Microgreens can be grown without soil using hydroponic or aquaponic systems. In this method, the plants are grown in a nutrient-rich water solution, ensuring their proper growth and development.
Microgreens have gained popularity recently due to their high nutritional value and quick growth cycle. These tiny plants, harvested immaturely, offer concentrated flavors and pack essential vitamins and minerals. While traditional methods involve soil cultivation, growing microgreens without soil using hydroponic or aquaponic systems is possible.
By providing the plants with a nutrient-rich water solution, the roots can absorb the necessary elements for growth. Not only does this method eliminate soil, but it also creates a controlled environment conducive to optimal growth.
We will explore the step-by-step process of growing microgreens without soil, allowing you to enjoy these miniature nutritional powerhouses in your home.
Choosing Your Microgreens
When it comes to growing microgreens without soil, one of the first things you need to consider is the type of microgreen you want to grow. With many options available, the decision to choose can be overwhelming.
This section will explore the popular varieties for soil-free growing and the benefits of this cultivation method.
Popular Varieties For Soil-free Growing
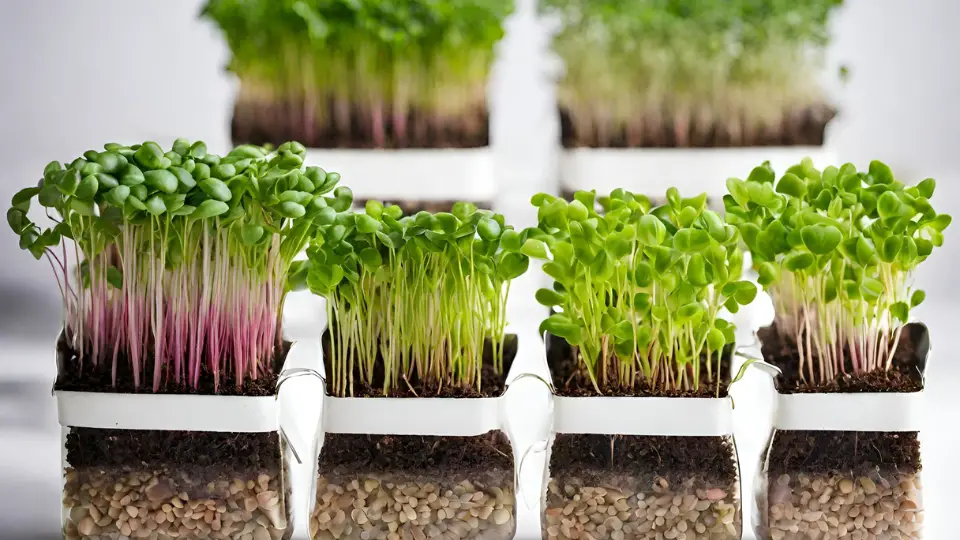
In soil-free microgreen cultivation, certain varieties thrive better than others. Here are some popular microgreen varieties that are well-suited for soil-free growing:
| Variety | Description |
|---|---|
| Radish | With its crisp texture and peppery flavor, radish microgreens are popular. They add a unique kick to salads, sandwiches, and other dishes. |
| Sunflower | Sunflower microgreens have a mild, nutty flavor and are rich in nutrients like vitamin E. They are often used as a garnish or added to green smoothies. |
| Broccoli | Broccoli microgreens pack a nutritional punch, offering high levels of vitamins A and C. Their mild flavor makes them versatile for adding to soups, stir-fries, or sandwiches. |
These are just a few examples of the many microgreen varieties you can grow without soil. Depending on your taste preferences and intended use, you can explore various options and experiment with combinations to create a vibrant and flavorful microgreen garden.
Benefits Of Soil-free Microgreen Cultivation
Soil-free microgreen cultivation offers several advantages over traditional soil-based methods. Here are some key benefits:
- Hygienic and clean: Growing microgreens without soil eliminates the risk of soilborne diseases, pests, and weeds.
- Water efficiency: Soil-free growing techniques such as hydroponics or grow mats allow for efficient water usage, reducing waste and promoting sustainability.
- Quicker growth: Microgreens grown without soil grow faster as they directly access water and nutrients.
- Compact and space-saving: Soil-free cultivation methods like vertical farming or using trays require minimal space, making it suitable for urban dwellers or those with limited gardening areas.
- Year-round cultivation: With soil-free techniques, you can grow microgreens indoors regardless of the season, ensuring a fresh supply of nutritious greens throughout the year.
By opting for soil-free microgreen cultivation, you can enjoy these benefits while creating a sustainable, nutritious, and convenient source of fresh greens right at home.
Soil-free Setup Essentials
To ensure their successful growth, you must set up the perfect environment to grow microgreens without soil.
By selecting the right containers, providing proper lighting conditions, and controlling temperature and humidity, you can create an ideal soil-free setup for your microgreens. Our article explains these essentials in detail so you can grow thriving microgreens without soil.
Selecting The Right Containers
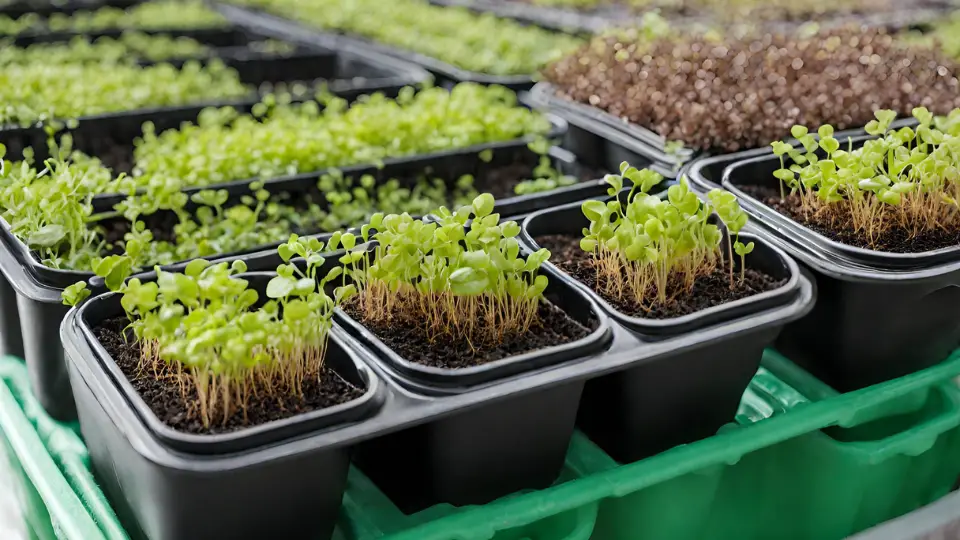
When it comes to growing microgreens without soil, selecting the right containers is crucial. These containers will serve as the foundation for your plants, providing support, aeration, and drainage. Opting for shallow trays or containers with drain holes is ideal for soilless setups.
Here are some key considerations to guide you in choosing the right containers:
- Size: Select containers, allowing sufficient space between seedlings, promoting airflow, and preventing mold.
- Material: Choose food-safe containers made of plastic, glass, or stainless steel that are non-reactive and easy to clean.
- Drainage: Ensure the containers have appropriate drainage holes to prevent waterlogging and root rot.
Ensuring Proper Lighting Conditions
Adequate lighting is essential for the successful growth of microgreens as they rely on light to convert energy through photosynthesis. When growing microgreens without soil, artificial lighting becomes integral to your setup.
Consider the following factors to ensure proper lighting conditions:
- Light Source: Utilize full-spectrum LED grow lights as they mimic natural sunlight and provide the optimal spectrum for microgreen growth.
- Intensity: Adjust the distance between the lights and the trays to provide the recommended light intensity for your specific microgreen varieties.
- Duration: Most microgreens require around 12-16 hours of light daily. Use an automatic timer to ensure consistent lighting schedules.
Temperature And Humidity Control Strategies
Proper temperature and humidity control are vital for the healthy development of microgreens. Maintaining the optimal conditions can support germination and growth while minimizing the risk of disease and pests.
- Temperature: Most microgreens thrive between 60-75°F (15-24°C). Use a thermostat or temperature controller to maintain a consistent and ideal temperature for your growing environment.
- Humidity: Microgreens typically require high humidity levels, ranging from 50-70%. Use a hygrometer and a humidifier or misting system to regulate and monitor humidity levels.
- Air Circulation: Adequate airflow helps prevent moisture-related issues and strengthens microgreens. Consider using fans or installing ventilation systems to ensure proper air circulation.
By carefully selecting the right containers, ensuring proper lighting conditions, and effectively managing temperature and humidity, you can establish an optimal soil-free setup for growing microgreens. Consider these essentials and enjoy the journey of cultivating nutritious and vibrant microgreens!
Preparing For Germination
Following these expert guidelines, learn how to grow microgreens without soil and ensure successful germination. With step-by-step instructions, you can easily prepare for the growth of vibrant and nutritious microgreens in your home.
Soaking Seeds For Optimal Growth
When growing microgreens without soil, one crucial step is preparing the seeds for germination. Soaking seeds before sowing can significantly improve healthy growth.
So, how should you go about this? To start, place your seeds in a clean, shallow container. Make sure to use organic, untreated seeds for the best results. Fill the container with water at room temperature, ensuring the seeds are fully submerged. The water level should be about one inch above the seeds.
Allow the seeds to soak for an appropriate time, which varies depending on the type of seed.
| Seed Type | Soaking Time |
|---|---|
| Broccoli | 8-12 hours |
| Radish | 6-8 hours |
| Sunflower | 8-12 hours |
| Pea | 8-12 hours |
After the soaking period, remove the seeds from the container and drain excess water. It’s important not to let them sit in water for too long, as this can lead to mold or rotting. Now, your seeds are ready to be sown in the soil-free medium.
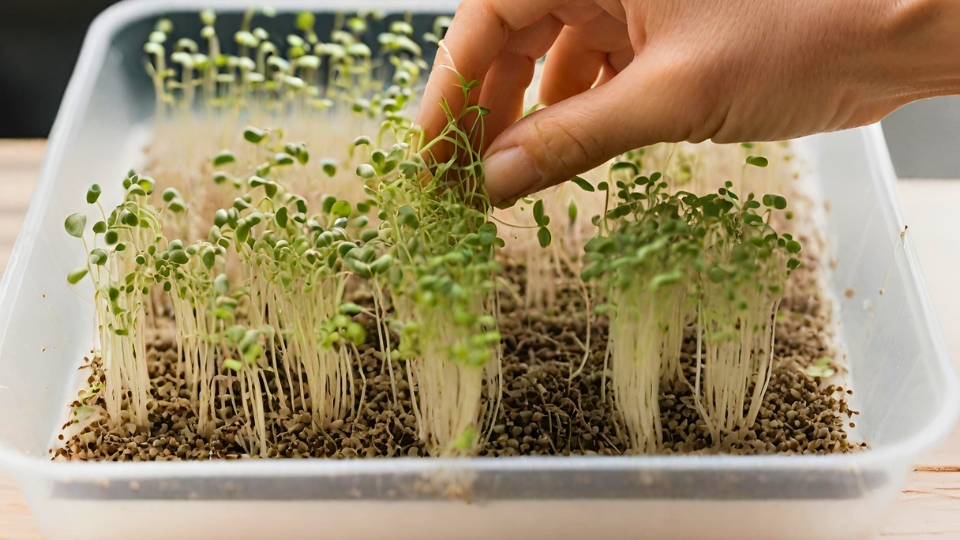
How To Grow: Preparing The Soil-free Medium
Creating a suitable environment for germination and growth is essential when growing microgreens without soil. Instead of traditional soil, you’ll need a soil substitute or medium. Here’s how to go about it:
- Choose a soilless medium such as coco coir, vermiculite, or peat moss. These alternatives provide the necessary structure, moisture retention, and aeration for the seeds to flourish.
- Moisten the medium by placing it in a container and adding water gradually while mixing it gently. Ensure moisture is evenly distributed throughout the medium, but avoid making it excessively wet or soggy.
- Fill your growing trays or containers with the moistened soil substitute. Leave a little space at the top to prevent overflowing when watering.
- Press down the soil substitute to create an even, flat surface for sowing the seeds. Ensure it’s not too compacted to allow the seeds to germinate and grow easily.
Sowing seeds with the proper spacing and depth To promote optimal growth and prevent overcrowding, sowing your microgreen seeds with the correct spacing and depth is crucial.
Follow these guidelines for successful seed placement:
- Sprinkle the soaked seeds evenly across the soil, ensuring they are spread out and not clumped together. A helpful tip is to use a small mesh sieve or your fingertips to disperse the seeds evenly.
- For spacing, aim for a gap of about half an inch between each seed to provide enough room for them to develop into healthy microgreens. This spacing allows for efficient nutrient absorption and minimizes competition among the developing plants.
- Once evenly spaced, gently press them into the soil substitute to ensure good seed-to-medium contact. Aim for a depth of about one-fourth to one-half inch, allowing the roots to establish themselves while allowing the cotyledons (the first leaves) to emerge correctly.
With the seeds sown at the appropriate spacing and depth, you are well on your way to growing thriving microgreens without soil. Now, all that’s left to do is provide them with the right care and conditions for successful germination and growth.
Monitoring Microgreen Growth Steps
Learn the steps for monitoring microgreen growth without soil. This guide provides easy-follow instructions for cultivating nutrient-rich microgreens at home.
Growing microgreens without soil is an innovative and efficient way to enjoy fresh, nutritious greens at home. As you embark on this soil-less microgreen journey, monitoring their growth closely is crucial to ensure optimal health and productivity.
This section will discuss the steps involved in monitoring the growth of your microgreens and help you resolve any common problems.
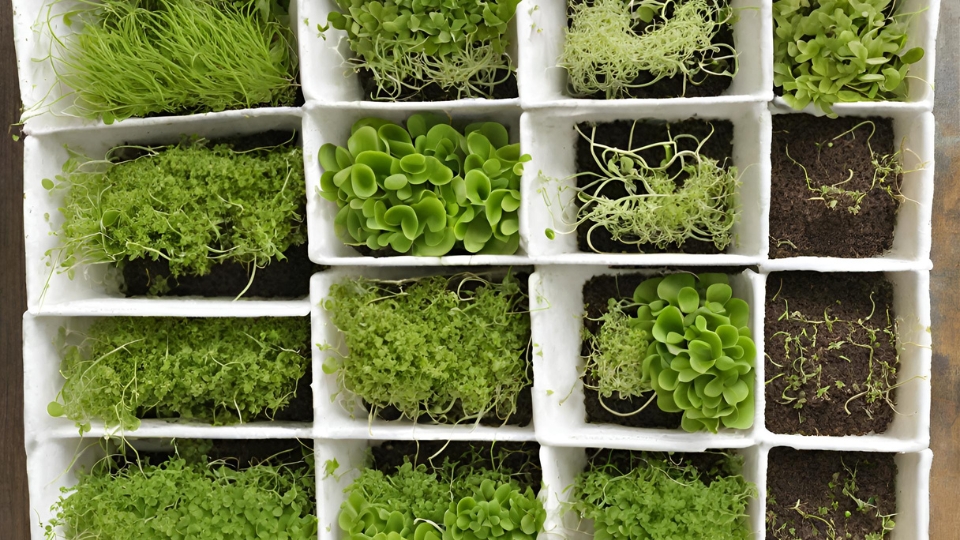
Daily Care Routine: Watering And Nutrients
To ensure the healthy development of your microgreens, it is essential to establish a daily care routine that includes proper watering and nutrient management. Here’s what you need to know:
- Watering: Regular watering is crucial for the growth of your microgreens. Use a spray bottle or misting system to gently water the plants, keeping the soil moist but not overly saturated. Aim to water them once or twice a day, not disturbing the delicate leaves.
- Nutrients: Microgreens can thrive without soil but require essential nutrients for optimal growth. You can use a liquid fertilizer formulated explicitly for hydroponic or soil-less growing to provide these nutrients. Dilute the fertilizer as instructed, and apply it to your microgreens according to the recommended dosage.
Identifying And Tackling Common Growth Issues
Even with proper care, microgreens may sometimes encounter growth issues. Here are some common problems you may encounter and how to address them:
- Yellowing leaves: If you notice yellowing leaves on your microgreens, it could indicate a nutrient deficiency or overwatering. Adjust your watering routine and ensure your microgreens receive adequate nutrients. If the issue persists, consider adjusting the lighting or checking for diseases or pests.
- Leggy growth: Leggy growth refers to when microgreens grow tall and spindly, indicating insufficient light. If you notice this issue, it may be time to introduce supplemental lighting to promote more compact and healthy growth. LED grow lights are popular for indoor microgreen cultivation, providing the necessary light spectrum for optimal photosynthesis.
- Mold or fungal growth: Excessive moisture or poor air circulation can lead to mold or fungal growth on your microgreens. To tackle this issue, ensure proper ventilation and avoid overwatering. If mold or fungus has already appeared, gently remove the affected plants and adjust your watering routine to prevent further growth.
When To Introduce Supplemental Lighting
Supplemental lighting becomes essential when natural light is insufficient for your microgreens’ growth. Knowing when to introduce supplemental lighting can significantly enhance their productivity. Consider the following factors:
- Daylight duration: Microgreens typically require 12 to 16 hours of light each day. Supplemental lighting can compensate for deficiencies if your location lacks sufficient daylight or has inconsistent lighting conditions.
- Light intensity: If you notice elongated or weak growth, it is a sign that natural light is insufficient. Supplemental lighting can provide the intensity required for robust and healthy microgreen growth.
- Light spectrum: Microgreens thrive best when exposed to a full spectrum of light that includes both blue and red wavelengths. LED grow lights designed specifically for plant growth offer the ideal light spectrum, ensuring your microgreens receive the necessary wavelengths for photosynthesis.
Monitoring the growth of your soil-less microgreens is integral to cultivating healthy and abundant greens. By establishing a daily care routine, addressing common growth issues, and introducing supplemental lighting when necessary, you can ensure the successful growth of your microgreens.
Remember to monitor their progress closely and make any necessary adjustments to provide the optimal conditions for a bountiful harvest.
Harvesting And Post-harvest Handling
One of the most satisfying parts of growing microgreens without soil is harvesting and enjoying homegrown greens. Your time and effort in increasing these delicate plants will yield vibrant and nutrient-rich microgreens ready to be harvested in their prime.
This section explores the optimal harvest time for various microgreen types. It will also explore different harvesting techniques for soil-free microgreens and how to store and handle them post-harvest properly.
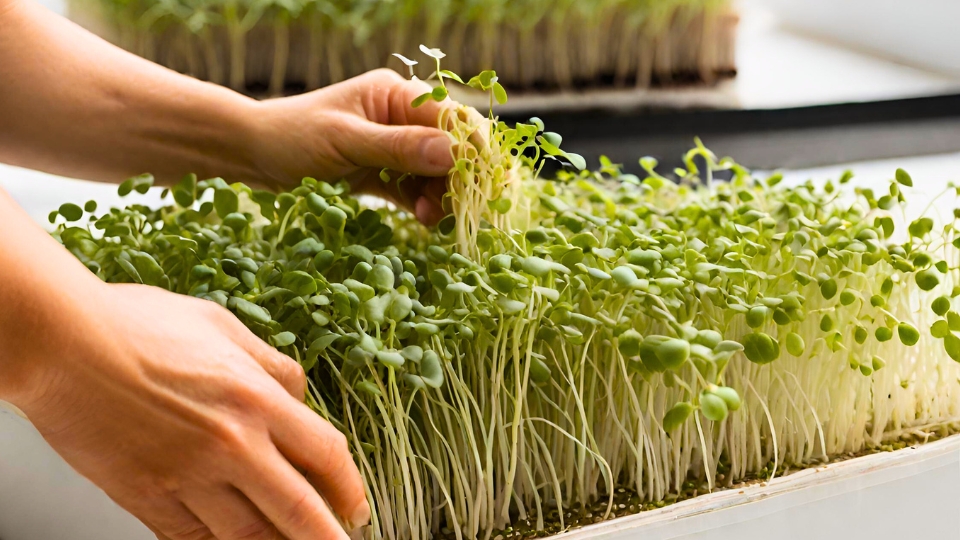
Optimal Harvest Time For Various Microgreen Types
Knowing the ideal time to harvest your microgreens is crucial to ensure you get the best flavor, texture, and nutritional value.
Harvesting too early or too late may result in subpar microgreens. Here are the optimal harvest times for some popular microgreen varieties:
| Microgreen Variety | Optimal Harvest Time |
|---|---|
| Broccoli | 7-10 days after sowing |
| Radish | 5-7 days after sowing |
| Sunflower | 10-14 days after sowing |
| Pea Shoots | 10-12 days after sowing |
Harvesting Techniques For Soil-free Microgreens
When harvesting soil-free microgreens, it’s important to use gentle techniques to preserve their delicate structure. Follow these harvesting steps for optimal results:
- Prepare a clean cutting surface and wash your hands thoroughly.
- Cut the microgreens above the soil-free growing medium using a sharp pair of clean scissors or a microgreen harvesting tool.
- Collect the freshly cut microgreens into a clean container or tray.
- Inspect the microgreens for any signs of damage or wilting, and remove any discolored or damaged leaves.
- Rinse the microgreens gently with cold water to remove any remaining particles from the growing medium.
How To Store And Handle Microgreens Post-harvest
Proper post-harvest storage and handling are essential to maintain your microgreens’ freshness, flavor, and nutritional value. Here are some guidelines to help you store and handle your microgreens effectively:
- Place the harvested microgreens in a clean, breathable container, preferably lined with a paper towel to absorb excess moisture.
- Store the container in the refrigerator at a temperature between 36°F (2°C) and 40°F (4°C) to maintain freshness.
- Ensure the microgreens are correctly sealed in the container to prevent exposure to air, which can lead to wilting and nutrient loss.
- Consume the microgreens within 2-3 days for optimal freshness and flavor.
- Before consumption, give the microgreens a quick rinse under cold water to refresh them.
By following these guidelines, you can enjoy the vibrant and nutrient-packed microgreens you have cultivated without soil, ensuring they remain fresh and delicious throughout their shelf life.
Frequently Asked Questions For How To Grow Microgreens Without Soil
How Do You Grow Microgreens Without Soil?
Growing microgreens without soil is possible using various methods such as hydroponics or an organic medium like coconut coir.
These alternative methods provide the nutrients and moisture for microgreens to grow, resulting in healthy and vibrant plants.
Conclusion
Growing microgreens without soil is a convenient and sustainable way to enjoy fresh, nutrient-rich greens all year round. Using alternative growing mediums such as hydroponics or growing mats, you can eliminate the hassle of tending to soil and still produce high-quality microgreens.
You can easily cultivate these miniature powerhouses in your home with the right techniques and proper care. So why wait? Start your soil-free microgreen journey today and experience the joy of harvesting your nutritious greens.
Video Source: https://www.youtube.com/watch?v=JVxOO9VSxqs

